Missions
Mission builder
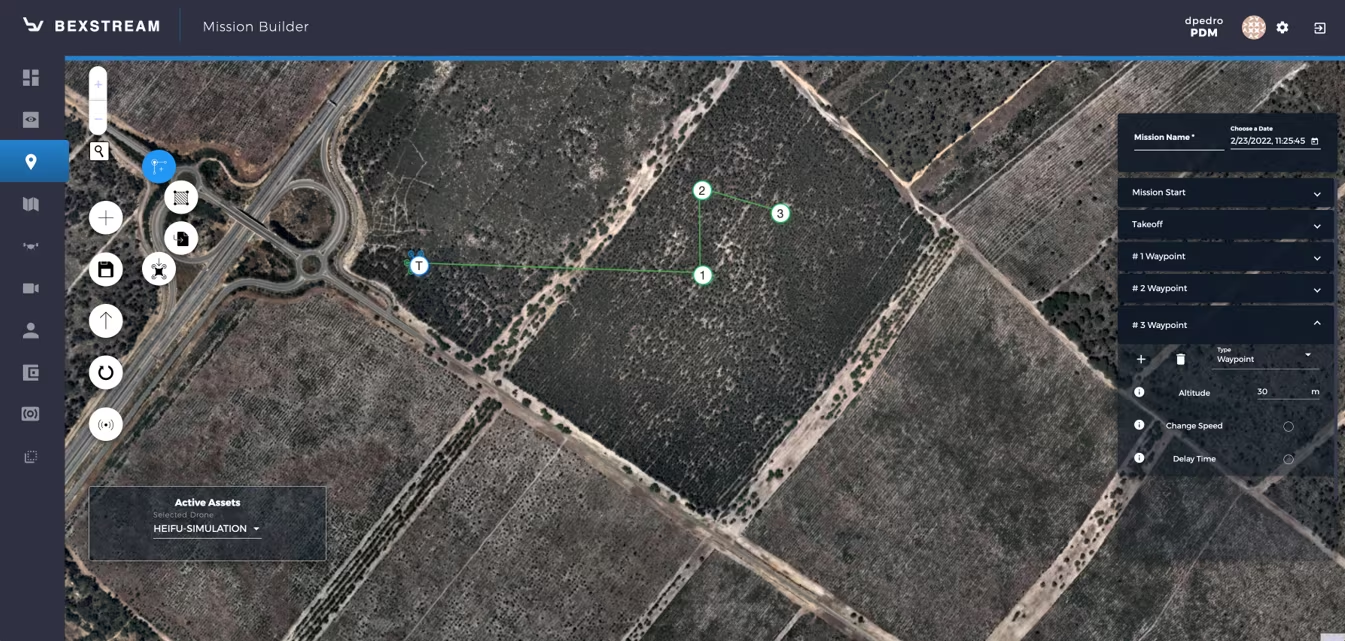
Fig. 49 Mission builder screen
On the Mission Builder Screen, the user can build new missions. The user can add waypoints or survey areas to the map. Furthermore, it’s also possible to import an already exported mission.
The buttons on the left-hand side can be used for:
Add waypoint: point that you desire the UAV to fly to;
Add survey: Area that you want the UAV to survey. Multiple options can be defined for survey areas (e.g., horizontal and vertical overlap, altitude, flight speed, path out of the area);
Import Mission;
Export Mission;
Save online;
Start Mission (sends the mission to the drone and starts it);
Push Mission to drone (downloads the mission to the drone without starting it);
To save a mission to the platform, the user must provide a mission name. If a name is not provided, the platform will autogenerate one for you.
To start a mission, the user must provide a mission name and must select a drone on the drones list on the left.
To schedule a mission, the user must input the time and date for the drone to start the mission.
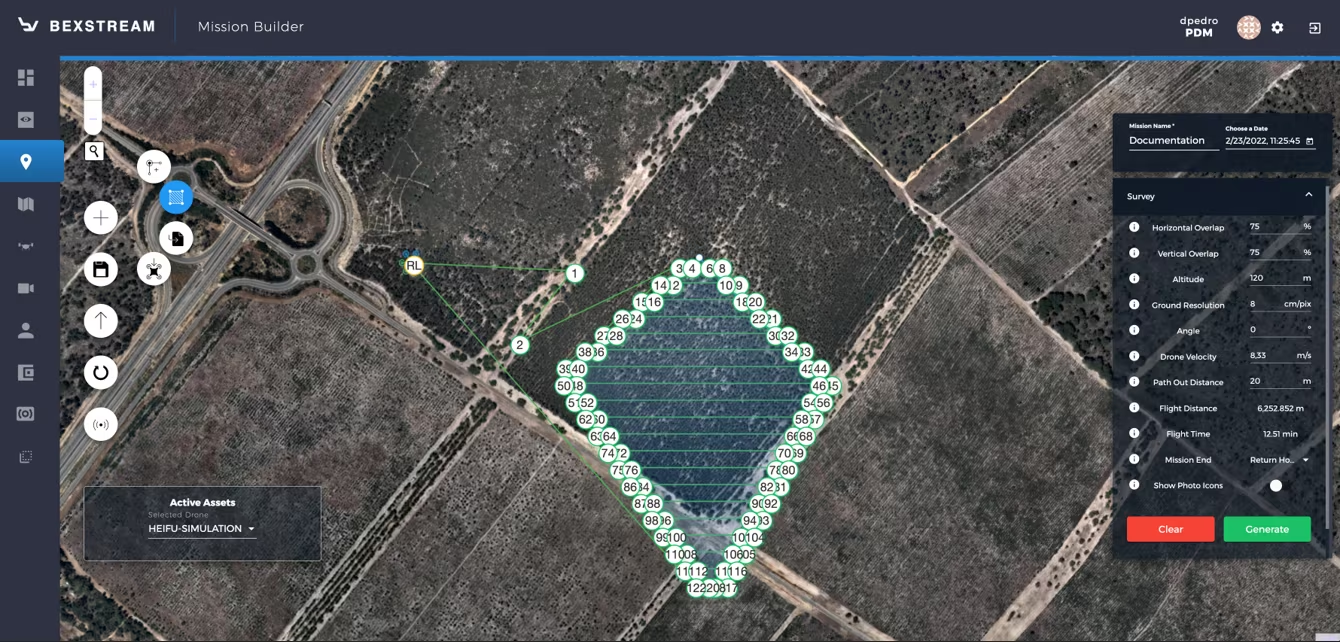
Fig. 50 Mission builder – example of a survey mission
The previous figure shows the example of a survey mission: after selecting four blue points on the map the survey is automatically generated. If the user edits the survey properties on the right-hand side form, it regenerates the survey plan.
The survey properties are the following:
Horizontal Overlap (%): Percentage of horizontal overlap between consecutive images;
Vertical Overlap (%): Percentage of vertical overlap between consecutive images;
Altitude (meters): Altitude relative to launch;
Ground resolution (cm/pix): distance represented by a pixel on the generated map;
Angle (degrees): drone survey flight angle;
Drone Velocity (meters/second): drone survey flight speed;
Path out Distance (meters): distance from the drone survey area to the outside turning points;
Flight Distance (meters): survey’s distance flown by the drone;
Flight Time (minutes): survey’s flight time flown by the drone;
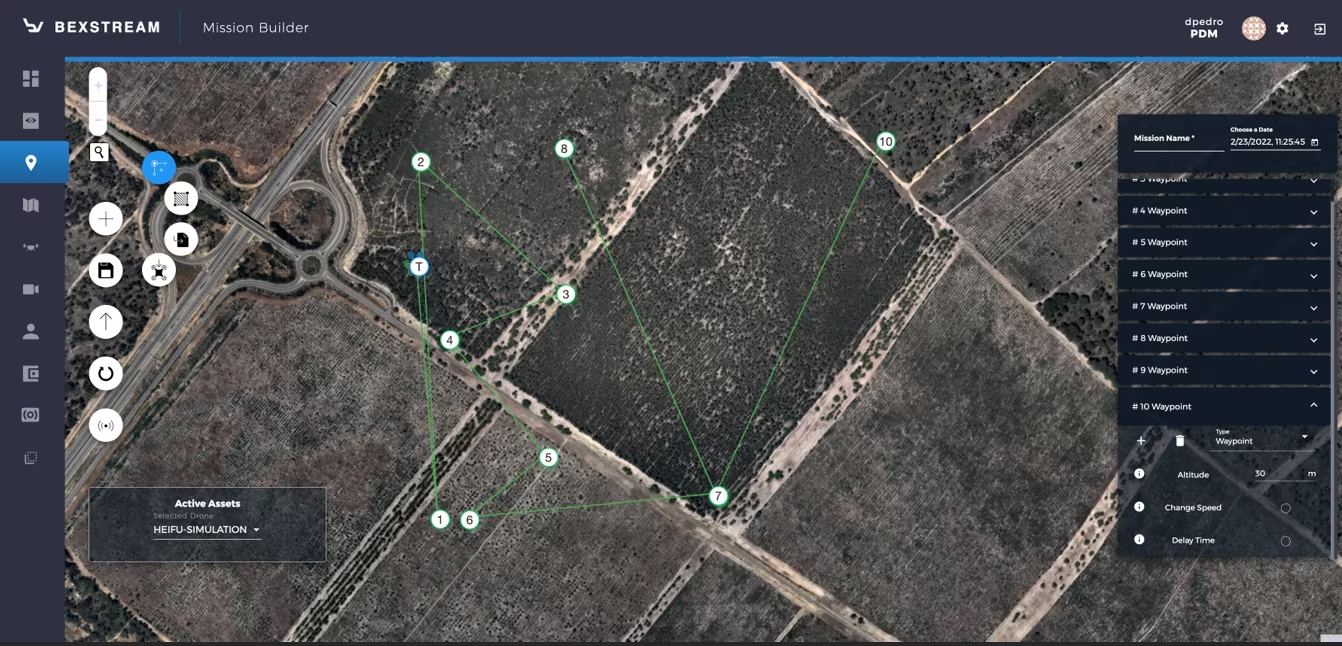
Fig. 51 Mission builder – example of a waypoint mission
The previous figure shows the example of a waypoint mission. By clicking on the “Add Waypoint” button, select on the map the positions where you want to add a new waypoint. On the right-hand side, you can access each waypoint that was added to the map and do one of the following:
Add middle waypoint;
Delete waypoint;
Change type of waypoint;
Input altitude;
Input flight speed.
When clicking on a waypoint (whether on the map or on the waypoints list on the right), the user can edit the following properties:
Altitude (meters): intended altitude to that waypoint, relative to the launch altitude;
Flight speed (meters/second): drone’s flight speed from that point onward;
Note
A mission should always have a takeoff, followed by the desired set of waypoints and end with a land command. You should pay close attention when designing a mission, to make sure the settings align between different commands (in terms of altitude & speed). You should pay special attention to the autonomy and make sure that the drone will always have enough battery to reach the landing site
Warning
Please be aware that the software is designed to give the user full control, meaning that missions are a very sensitive functionality. Missions should be designed by someone that has experience and is aware of the drone’s autonomy and range of operation. Beyond Vision does not accept responsibility for any damages, to the drone or others, resulting from poor mission design.
Executing a Mission
When a drone is connected and a mission is created, the user can start the mission. During the execution, the user can track the status of the drone (check the following figures):
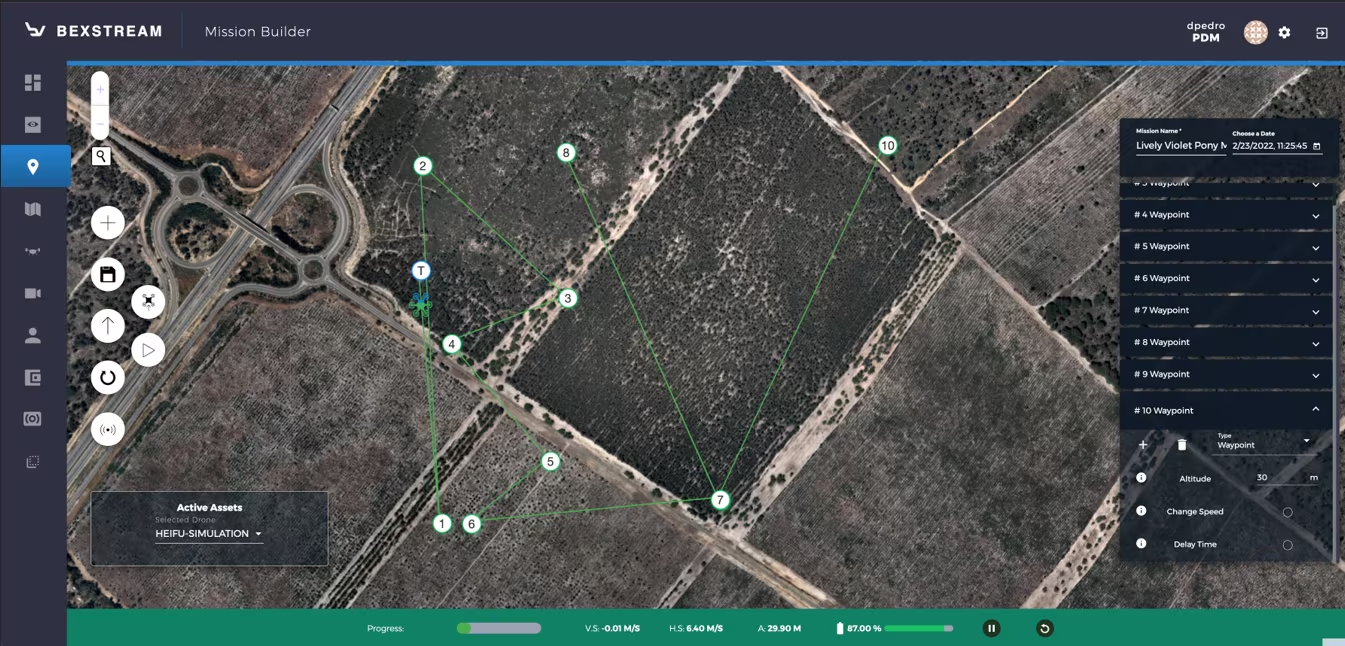
Fig. 52 Mission builder – executing a waypoint mission
On the bottom the user can check the status of the current mission:
Percentage of mission completed (waypoints reached / total waypoints);
Drone’s Vertical speed;
Drone’s Horizontal speed;
Drone’s Altitude;
Drone’s Battery level.
After the mission has started, three buttons appear near the start and push mission buttons:
Stop Mission - This button will stop the execution of the current mission (the drone will stand still until new commands are given and will not return to the takeoff position).
Resume Mission - This button will resume the execution of the current mission.
RTL - (Return To Land) This button will return the drone to its last landing position.
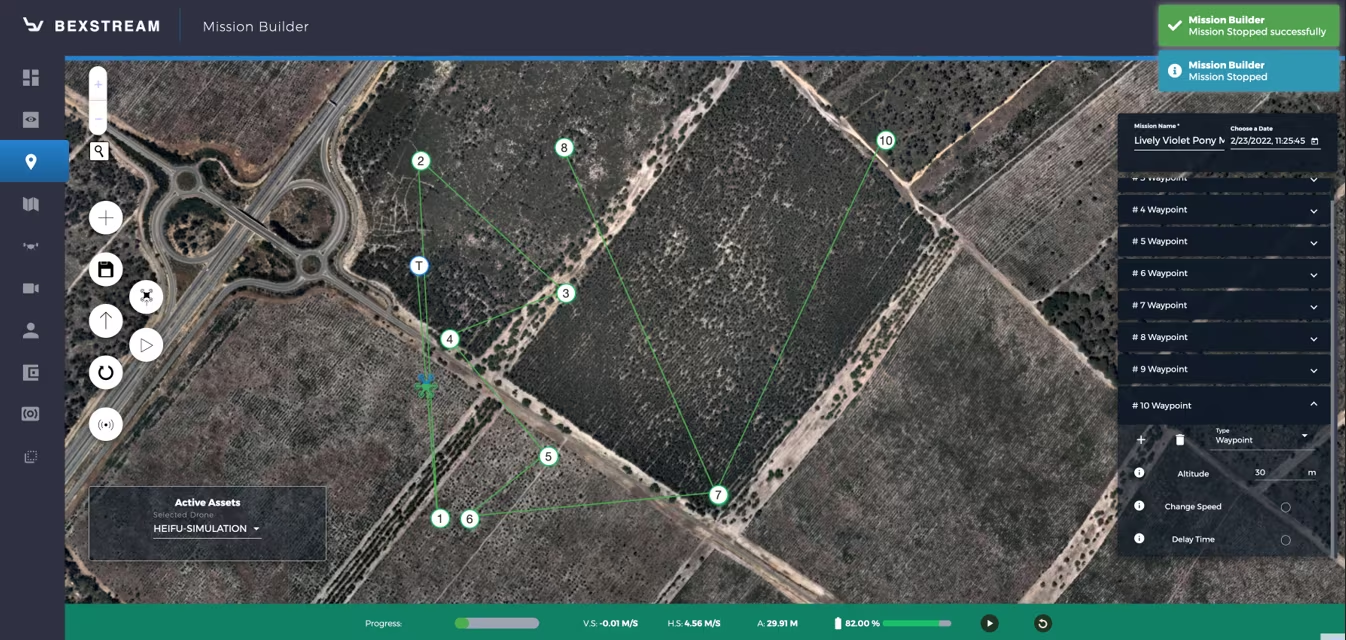
Fig. 53 Mission builder – example stopping a mission under execution
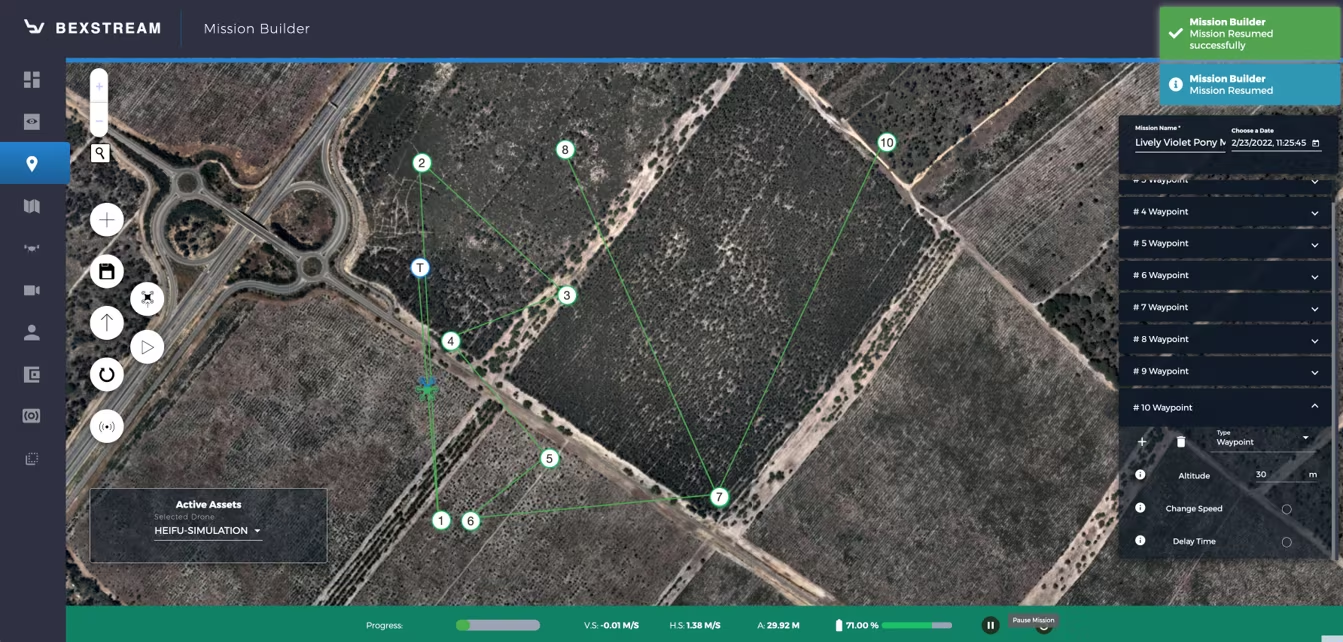
Fig. 54 Mission builder – example resuming a mission that was stopped
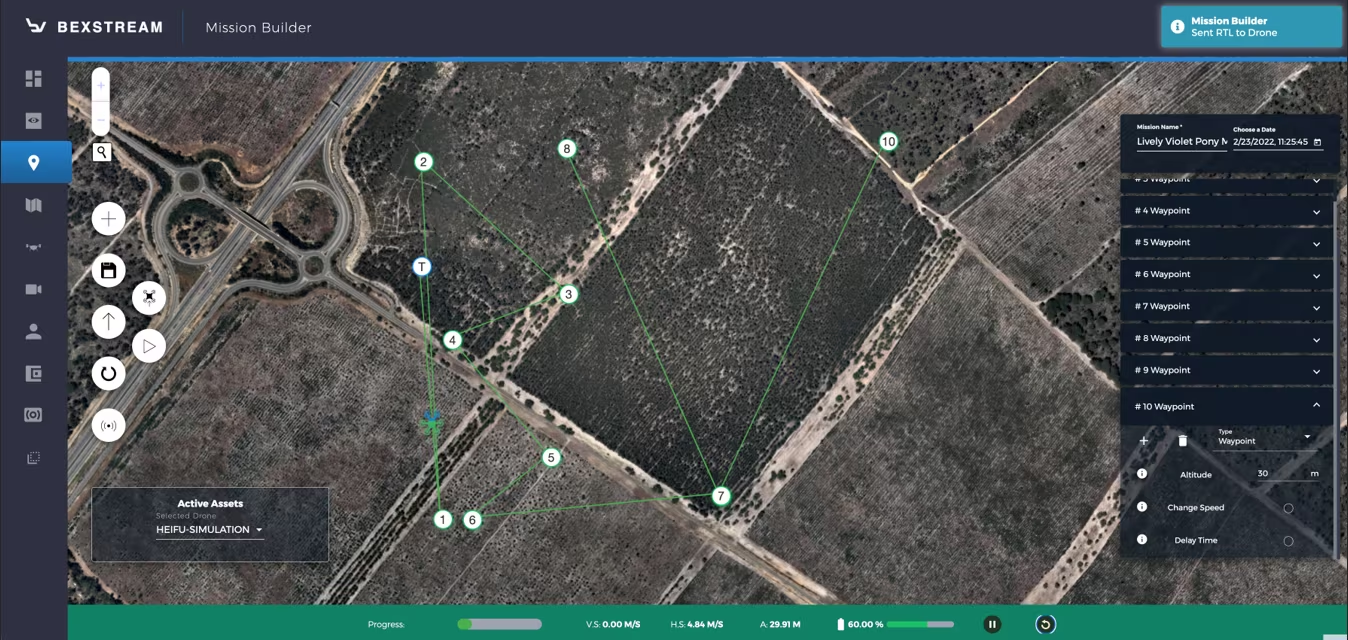
Fig. 55 Mission builder – example aborting a mission under execution (reply)
Missions Menu
In the Missions menu, the user can access previously created missions and edit or delete them.
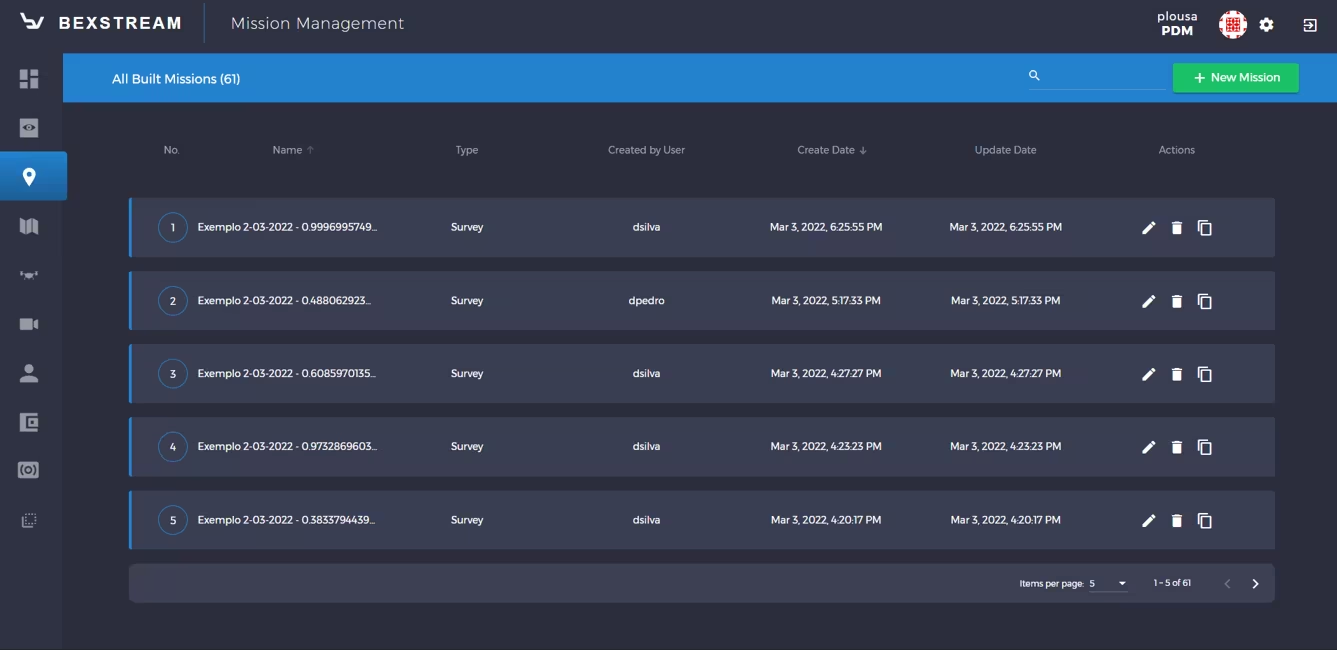
Fig. 56 Missions menu
Scheduled Missions
In the Scheduled Missions menu, the user can access previously scheduled missions and edit or delete them.
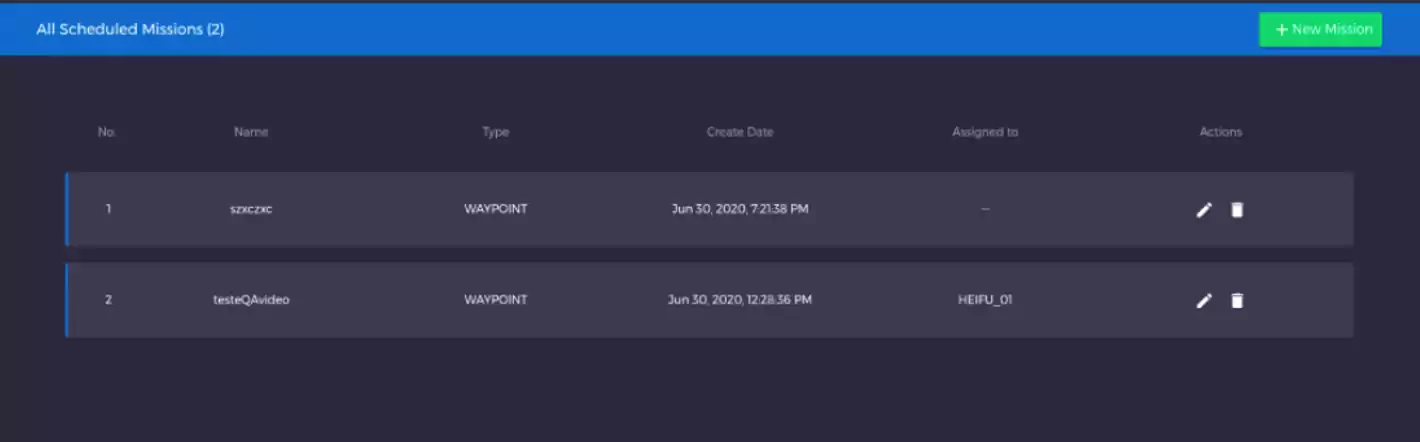
Fig. 57 Scheduled Missions menu