Reference menus
Users
In the Users menu the organization admin can take care of the user management: creation, update and delete an existing user.
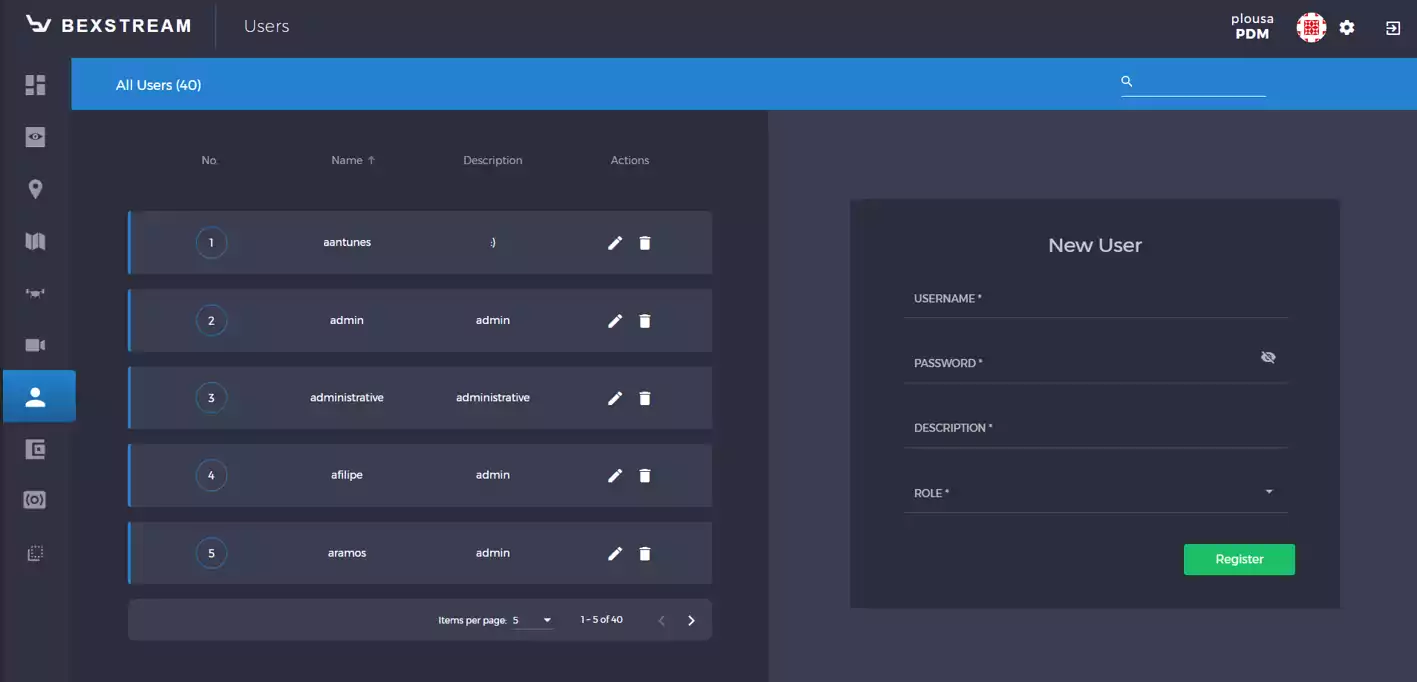
Fig. 37 Users Menu
Users creation
To create a new user, the following fields must be filled:
Username.
Password.
Description of the new user (optional).
Role assigned to the new user. This role will be important to the access control of certain areas of the application. As an example, the role “drone pilot” only has access to the monitor screen.
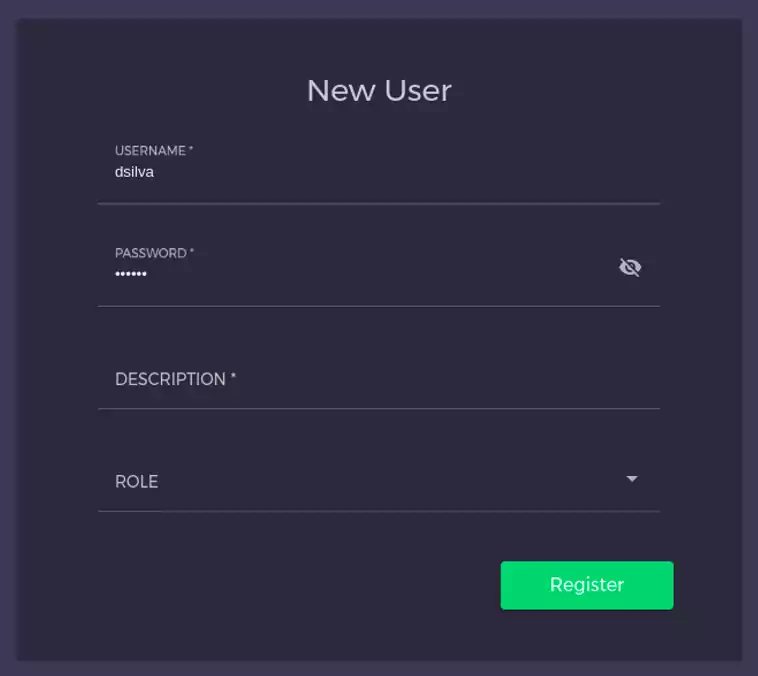
Fig. 38 User creation
Users update
To update an existing user, just change the needed fields.
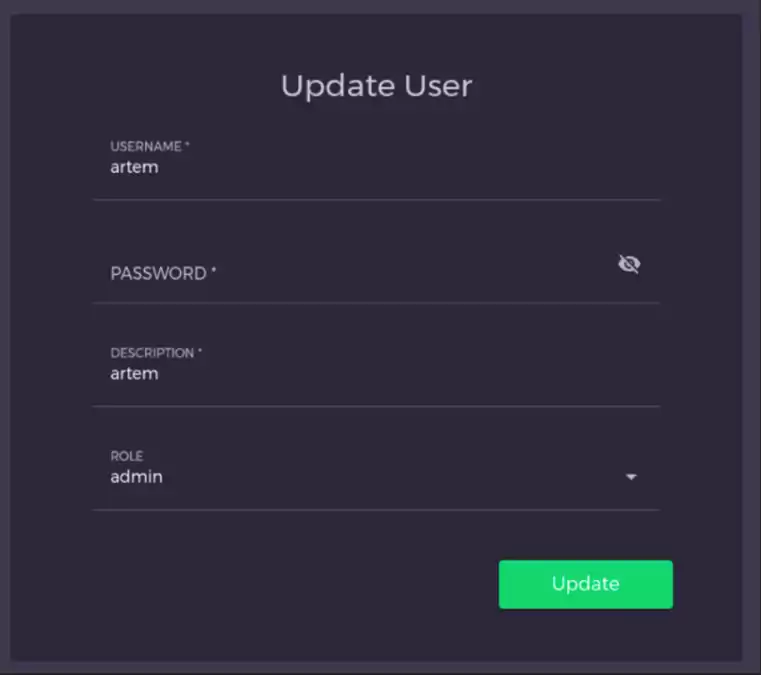
Fig. 39 User updating
Delete a user
To delete a user, just click the bin icon (under Actions column) on the users list.
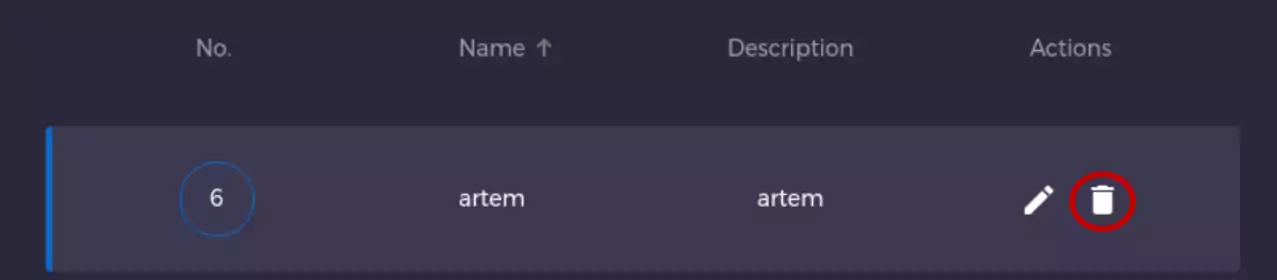
Fig. 40 Deleting a user
Roles
In the Roles menu, the manager can take care of the role management: creation, update and delete an existing role. Roles are used in beXStream for access control to certain menus of the application. As an example, a “drone pilot” role only has access to the Monitor menu while an “operations manager” has access to both Monitor and Mission Builder menus (this is fully configurable).
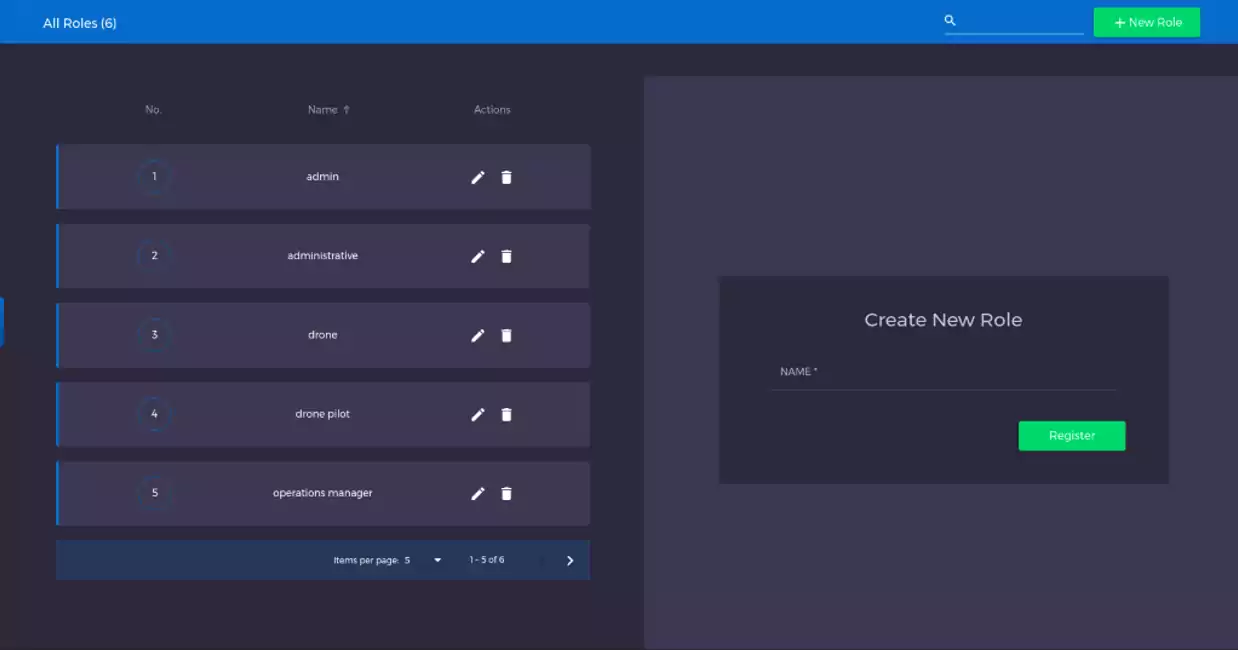
Fig. 41 Roles menu
Roles creation
To create a new role, just add a new type of role that fits your needs. That role will be displayed on the user creation form and on the permissions’ list that will be described below.

Fig. 42 Roles creation
Roles Updating
To update a role, click the pen icon (under Actions column) on the roles list and edit the name of the role on the right form.
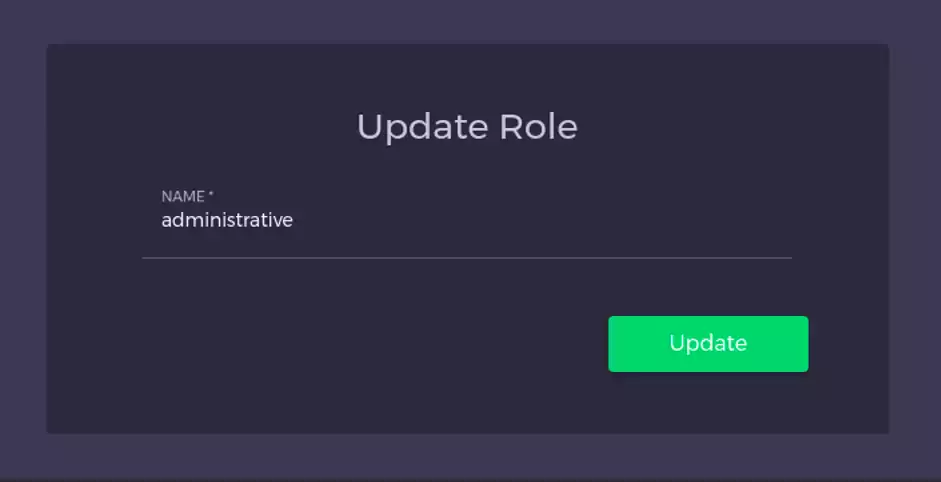
Fig. 43 Roles updating
Delete Roles
To delete a role, just click the bin icon (under Actions column) on the roles list.

Fig. 44 Deleting a role
Permissions
In the Permissions menu, the manager can manage the access control per role to pages that the platform has available. To do this the manager must check the action on the left with the role on top.
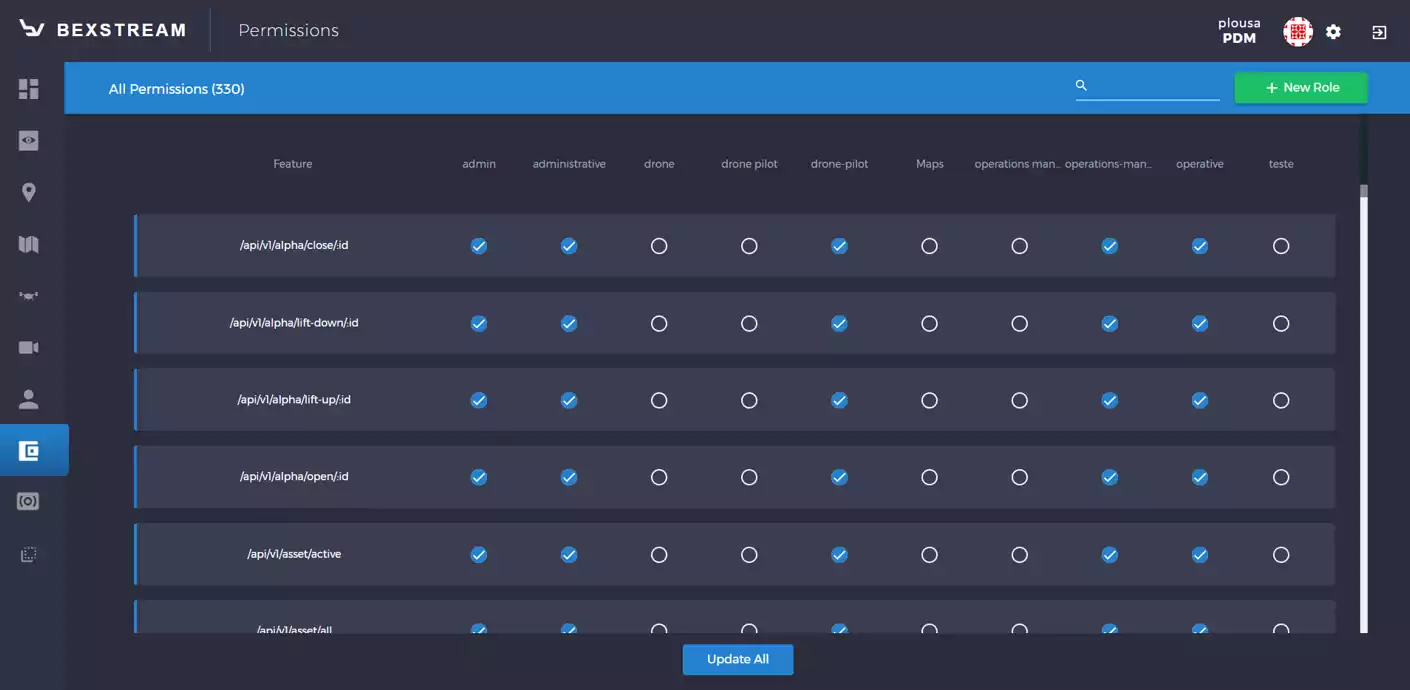
Fig. 45 Permissions menu
Assign and Revoke Permissions
As an example, if the admin wants to give the roles “drone pilot” and “operations manager” access to the Monitor menu and only wants the “Admin” to have access to the User menu:
Search by “Monitor” on the search box on the top right.
Check the intended roles.
Update the permissions.
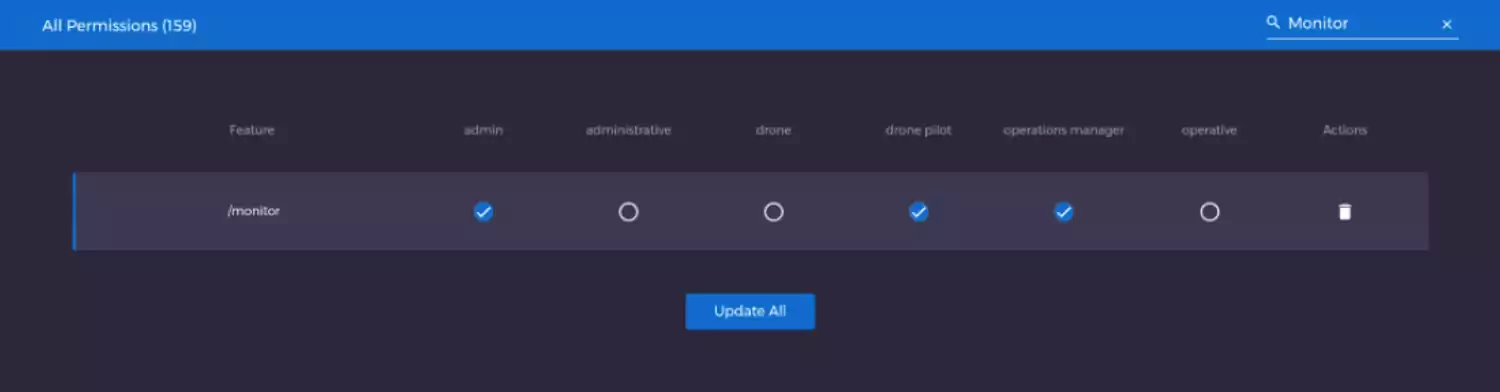
Fig. 46 Permissions assignment example 1
Search again by “User”
Check the “Admin” Role on the feature rows
Update the permissions
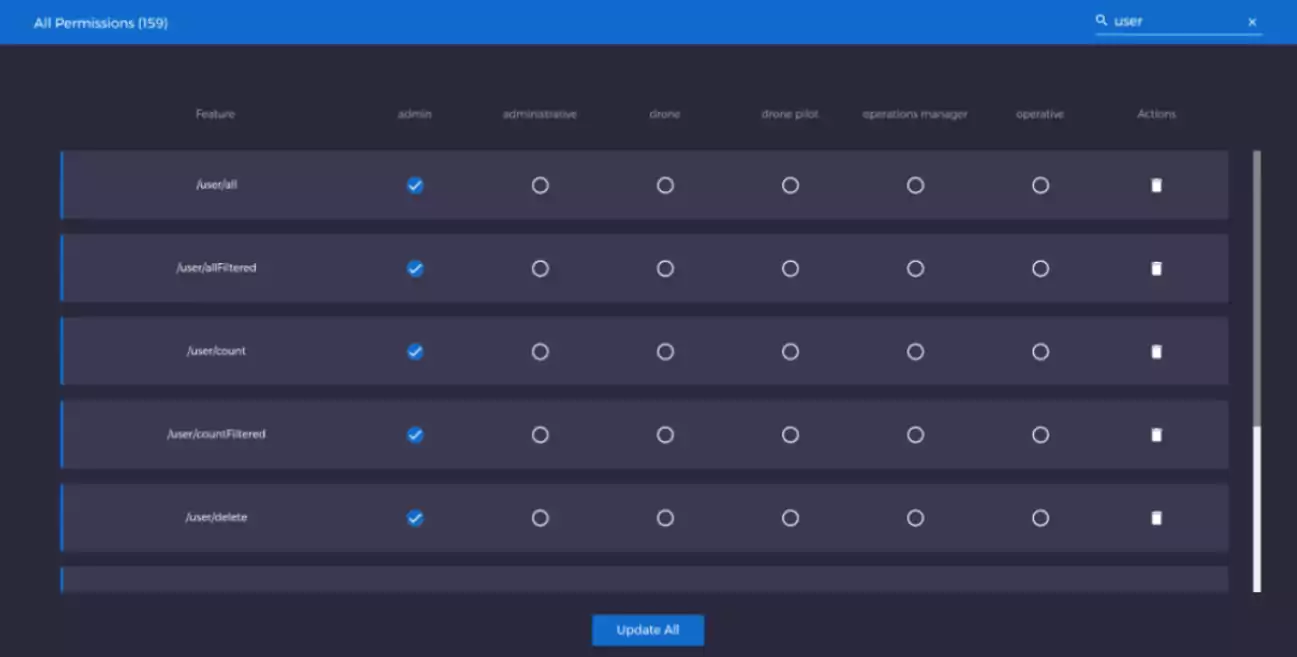
Fig. 47 Permissions assignment example 2