Online Control
This chapter elaborates the procedures for the successful installation and configuration of the HEIFU® ecosystem. Should you have any doubt, please contact Beyond Vision’s technical support.
beXStream® platform setup
In the case that you have purchased a beXStream® platform license, you are entitled to access the application. The beXStream® platform can be run either using a web browser or a desktop app. Please follow the instructions below in order to successfully access the platform.
Web browser
The beXStream® platform runs on any of the major web browsers. However, the best results can be achieved if you use Google Chrome, Firefox and Safari. To access the application, you should open your browser and type in the following address: https://bexstream.beyond-vision.pt/login . You should see a screen like the one shown in the picture below:
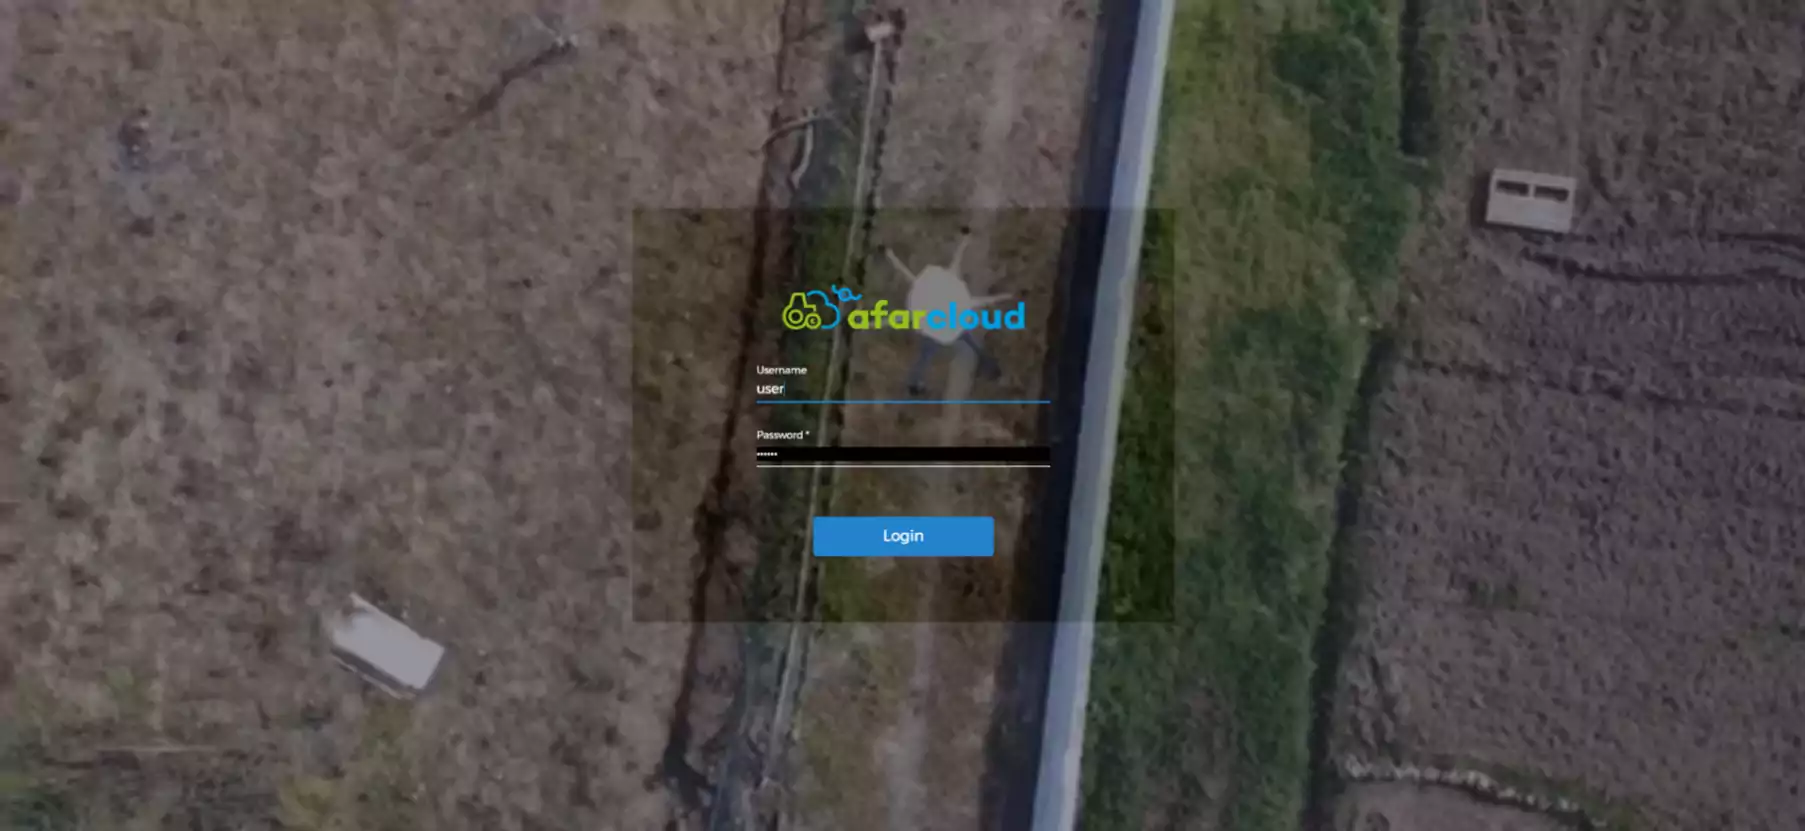
Fig. 22 beXStream® web browser login screen
Type in the login you were given in order to start using the application. You should start by changing the password you were given to a password of your choice (refer to section Users to learn how). Now, you can start exploring all the functionalities provided by the platform. Refer to Reference menus to help you go through the menus and options of the application.
Desktop App
The beXStream® platform can run on Microsoft 10, Ubuntu 18.04+ and MacOS Mojave +. In order to obtain the beXStream® desktop version, visit the https://bexstream.beyond-vision.pt and download the desktop version that better suits your Operating System.
Double click the installer and run the process until you have successfully installed the application and then run the application. You should see a screen like the one below:

Fig. 23 beXStream® app login screen
Type in the login you were given (please refer to section beXStream® platform) in order to start using the application. You should start by changing the password you were given to a password of your choice. For this, go to Users and edit the password of your user. The admin user of an organization can create, manage and delete all users of his organization. Furthermore, the permissions for a given class of users (e.g., pilot role) can be setup by the organization admin user. Now, you can start exploring all the functionalities provided by the platform. Refer to chapter beXStream® platform to help you go through the menus and options of the application.
Drone Setup
In order to prepare the drone for its first flight, you should follow the instructions below. You don’t need any additional tools besides the ones that are provided by Beyond Vision drone kit.
Start by unpacking the HEIFU® kit contents from the provided case;
Before any flight, you should confirm that the batteries are charged. This is especially important before the first flight. Please follow the instructions of section Batteries charging and handling in order to charge the batteries;
Unfold each of the six drone’s arms as in the picture below (gently push the arm up until you hear the click of the arm lock signalling the end-of-course):
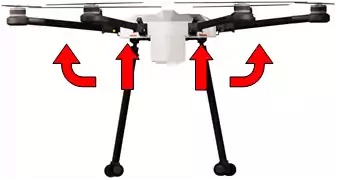
Fig. 24 Unfolding the arms
Place the battery in the battery compartment (push the battery all the way through until you hear the side clips fit into the battery compartment):
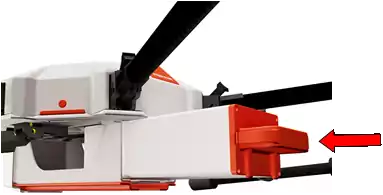
Fig. 25 Placing the battery
Turn on the drone (push the on/off button for one second). The on/off button shall turn the LED on and power up. Please wait a few seconds, until you hear the flight controller melody, showing that it successfully powered up and everything is ok (refer to the troubleshooting chapter if this doesn’t happen).
The flight controller needs to be calibrated at this stage for its best performance. Please follow the steps provided in section Drone Calibration to perform this calibration.
Note
Please be aware that for safety reasons, the batteries are shipped at storage levels. This means that they are at nearly half their capacity and should be charged before their first use.
Drone Calibration
In order to obtain the best performance, the drone needs to be calibrated, which means to fine tune its inertial navigation sensors, namely the accelerometer, the magnetometer and the level horizon. You should regularly perform this calibration process (at least once a month). Also, you should perform calibration each time you take the drone to a location far from the last calibration (>300km), or when the conditions are significantly altered (e.g.: very different altitude). To calibrate the drone, you must have your computer connected to the drone (by connecting the drone and accessing the beXStream® platform) and go to the beXStream® application Menu Drones->Drone and press ‘Calibrate’. The application will contact the on-board flight controller and guide you through the process of calibration. Just follow the steps shown on screen. Take the drone to an open space to perform the calibration.
Warning
Please ensure that the drone is not armed before you start the calibration process, since this may cause you injury.
Fig. 26 Selecting the calibration process of the drone
After pressing “calibrating drone” the following menu will be displayed:
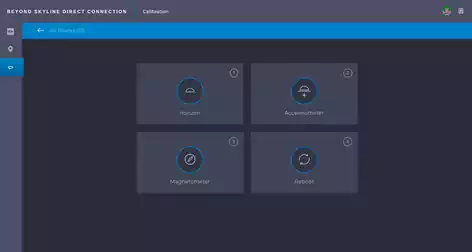
Fig. 27 Calibration Menu
At this stage, there are three options for calibrating the drone sensors: horizon, accelerometer and magnetometer. There is also a reboot option for the end of each calibration.
Horizontal Calibration
To level the horizon of the drone, place the drone on an even surface and click “Horizon”. In Fig. 28 we can observe the result of a successful calibration. If the drone is not correctly placed the square will be reddish showing that it has failed.
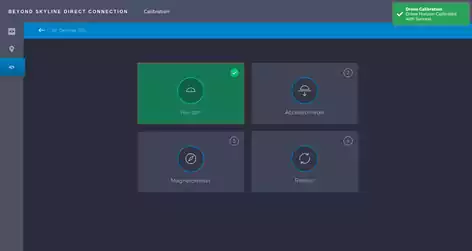
Fig. 28 Successful horizontal calibration
Accelerometer Calibration
To calibrate the accelerometer the drone will have to be held steadily in each position indicated in the depicted screen in Fig. 29. After the drone is in the desired position press next, to confirm and get indications for the next position: Six positions are needed: level, left side, right side, nose up, nose down, and upside down.
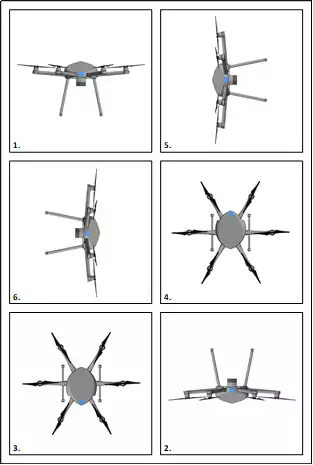
Fig. 29 Calibrating positions for accelerometer
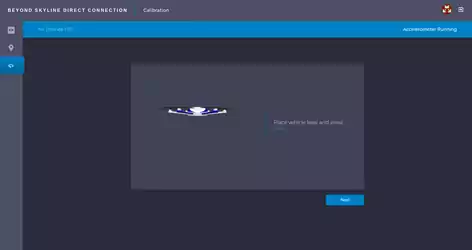
Fig. 30 First position of accelerometer calibration
At the end, a reboot option will appear to save the calibration and restart the drone.
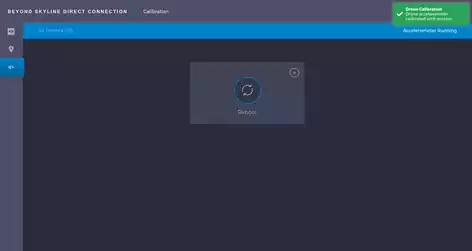
Fig. 31 Reboot prompt after successful calibration of accelerometer
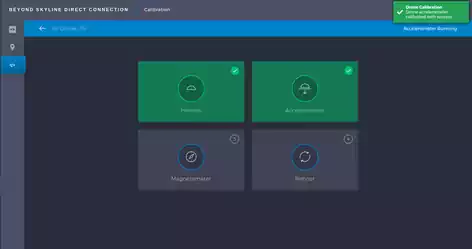
Fig. 32 After rebooting with a successful calibration
If the calibration fails, the square will be reddish and the user needs to restart the calibration.
Magnetometer Calibration
The calibration process of magnetometer requires the user to pick up the drone and rotate it at least twice in all his 3 axis.
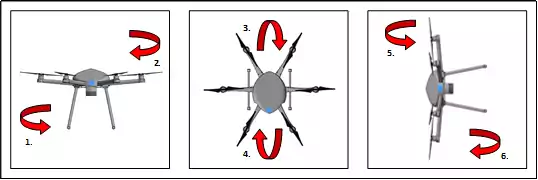
Fig. 33 Rotation needed for the magnetometer calibration
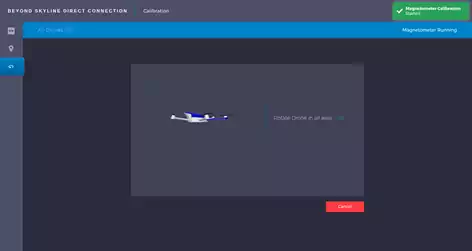
Fig. 34 Calibrating the magnetometer (compass)
In Fig. 35 the drone is rotating and it’s possible to see all the rotations needed to successfully calibrate the drone.
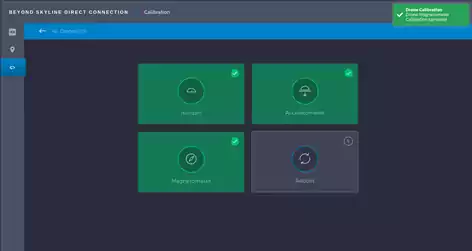
Fig. 35 Calibration Menu after successful calibration
If successful, the application will show the success of the calibration on screen. If not, the application will ask you to start over, as this process is very important to assure the best performance of the drone.