Welcome!
Thank you for purchasing Beyond Vision’s VTONE! This guide will help you getting started and profit the most from your most recent acquisition!
Before you start, please take a moment to get to know the VTONE:
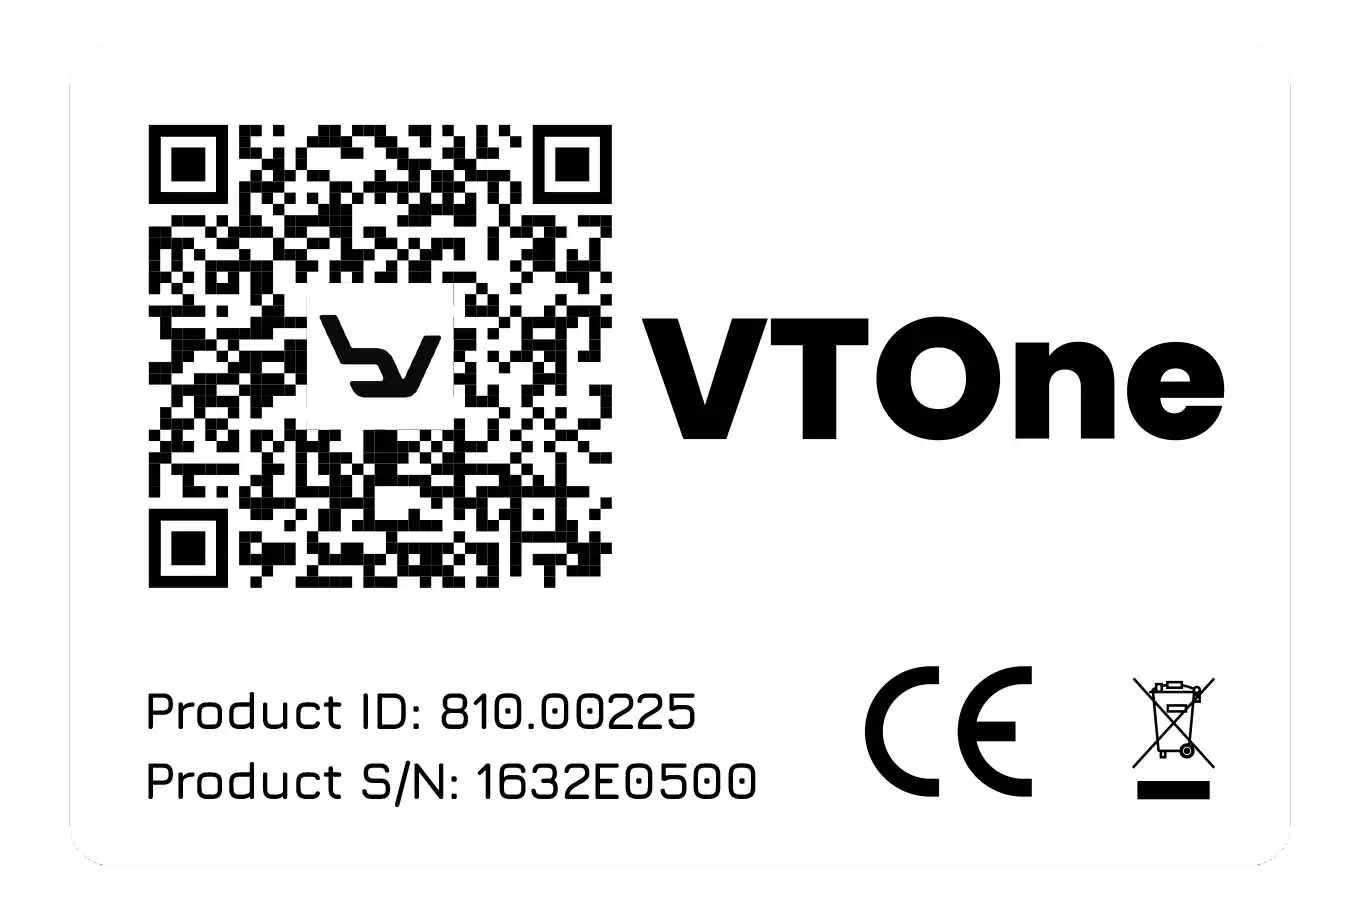
You can confirm the product and model by taking a look at the drone’s label (below the drone, near the battery tray), which must look like this one:
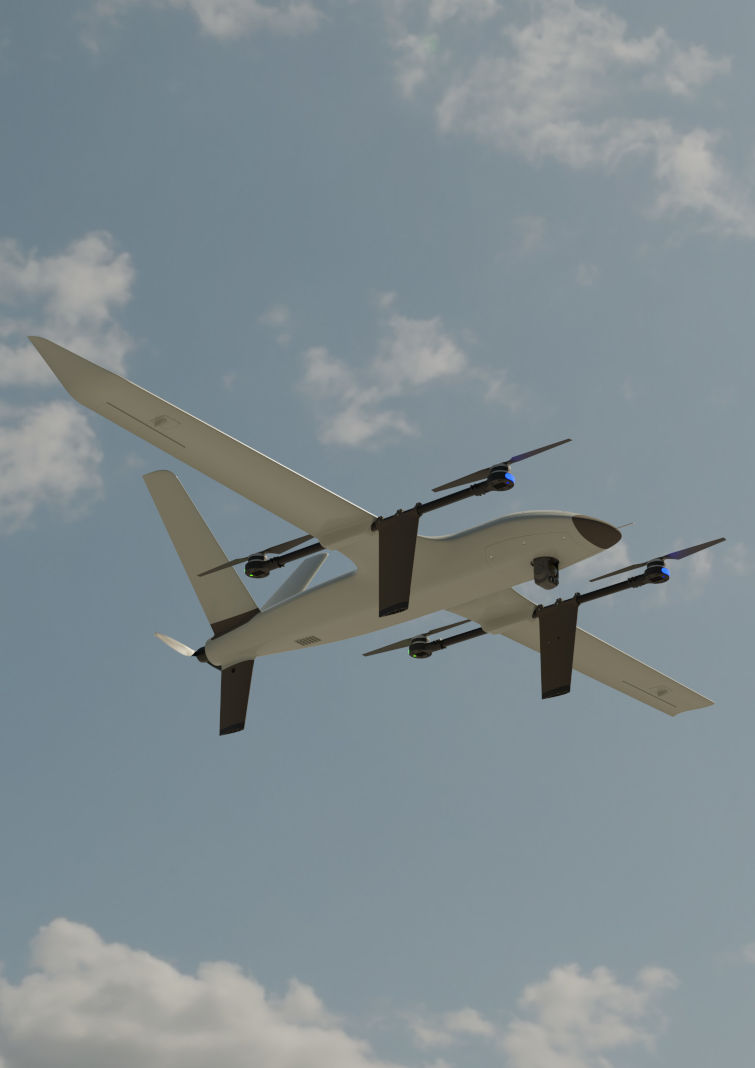
The VTONE is a quadplane drone, which means it’s hybrid unmanned aerial vehicle (UAV) that combines the features of a quadcopter and a fixed-wing aircraft. It is designed to operate in both vertical takeoff and landing (VTOL) mode, like a quadcopter, and in forward flight mode, like a traditional airplane.
In its VTOL configuration, the quadplane drone uses four vertically-oriented propellers, similar to those found on quadcopters, to lift off and land vertically. This allows it to take off and land without the need for a runway or a catapult launch system, making it suitable for operating in confined spaces or areas with limited infrastructure.
Once the quadplane drone reaches a certain altitude, it transitions to forward flight by tilting its motors and wings to a horizontal position. In this fixed-wing mode, it relies on the aerodynamic lift generated by its wings to sustain flight, making it more energy-efficient and enabling longer endurance and range compared to pure quadcopters.
The ability to switch between VTOL and fixed-wing flight makes quadplane drones versatile and well-suited for various applications, including mapping, surveillance, reconnaissance, cargo delivery, and even some military operations. They offer the benefits of both rotary-wing and fixed-wing aircraft, providing a valuable combination of flexibility and efficiency in aerial operations.
Moreover, this is a Class C3 drone, according to the criteria established by the EU Regulation 2019/945, Part 4.
The VTONE is designed to be a versatile drone for multiple areas, a quick assembly design. It allows the installation of different modules to answer the needs of the user. It is prepared to be equipped with gimbals, mapping payloads, and custom supports. This configuration is ideal for running complex Artificial intelligence algorithms, which makes VTONE the perfect drone for complex tasks such as event detection or object counting.
Among the many useful features of this drone, the following ones stand out from the crowd:
beXStream® platform: a web platform that enables the user to remotely plan and follow all the drone’s movements in an user-friendly web application. The on-board computer uses ROS (Robot Operating System), an open platform used to integrate different inputs and run multiple algorithms such as image processing, data relaying and others;
Autonomous missions: the software allows for pre-planned missions to be loaded onto VTONE, and afterwards be performed autonomously either in real-time or on a schedule;
Stable and safe flight: the six arms concept allows that the drone continues flying and land safely even if a rotor gets damaged, preventing an abrupt fall that could destroy the device. A state-of-the-art flight controller ensures a stable flight, even in non-ideal weather conditions;
Autonomy: a high-performance Li-Po battery ensures stable and long-duration power to all the drone’s complex electronic circuits. The VTONE also comprises a security mechanism that continuously monitors the battery level so to safely land the drone if the battery voltage falls below a safe threshold;
Increased positioning precision: an on-board RTK (Real Time Kinematic) GNSS module enhances the navigation accuracy, obtaining localization estimation down to an error of about 10cm. Moreover, the positioning module supports, besides GPS, all major satellite navigation systems such as GLONASS, GALILEO, Beidou and QZSS increasing the positioning availability and precision by fusing all the data;
Advanced communications: the VTONE enables the usage of local communications (such as Wi-Fi), but also long-range mobile networks such as 4G and 5G for the best experience of real-time piloting and video streaming;
Just add the accessories and go: a multitude of accessories can be added to the drone (up to the payload capacity of the drone) like several types of cameras, sensors and others to take the flying experience to a higher level.
Please follow closely the setup and configuration procedures, as well as the warning information to benefit the most from your VTONE.
Product description
What’s in the box
Beyond Vision’s VTONE comes enclosed in a custom-made special casing, assembled to ensure the best protection of the device before it reaches you. If you receive the drone with any part missing or broken, please contact Beyond Vision immediately. Inside the case you should find the following components:
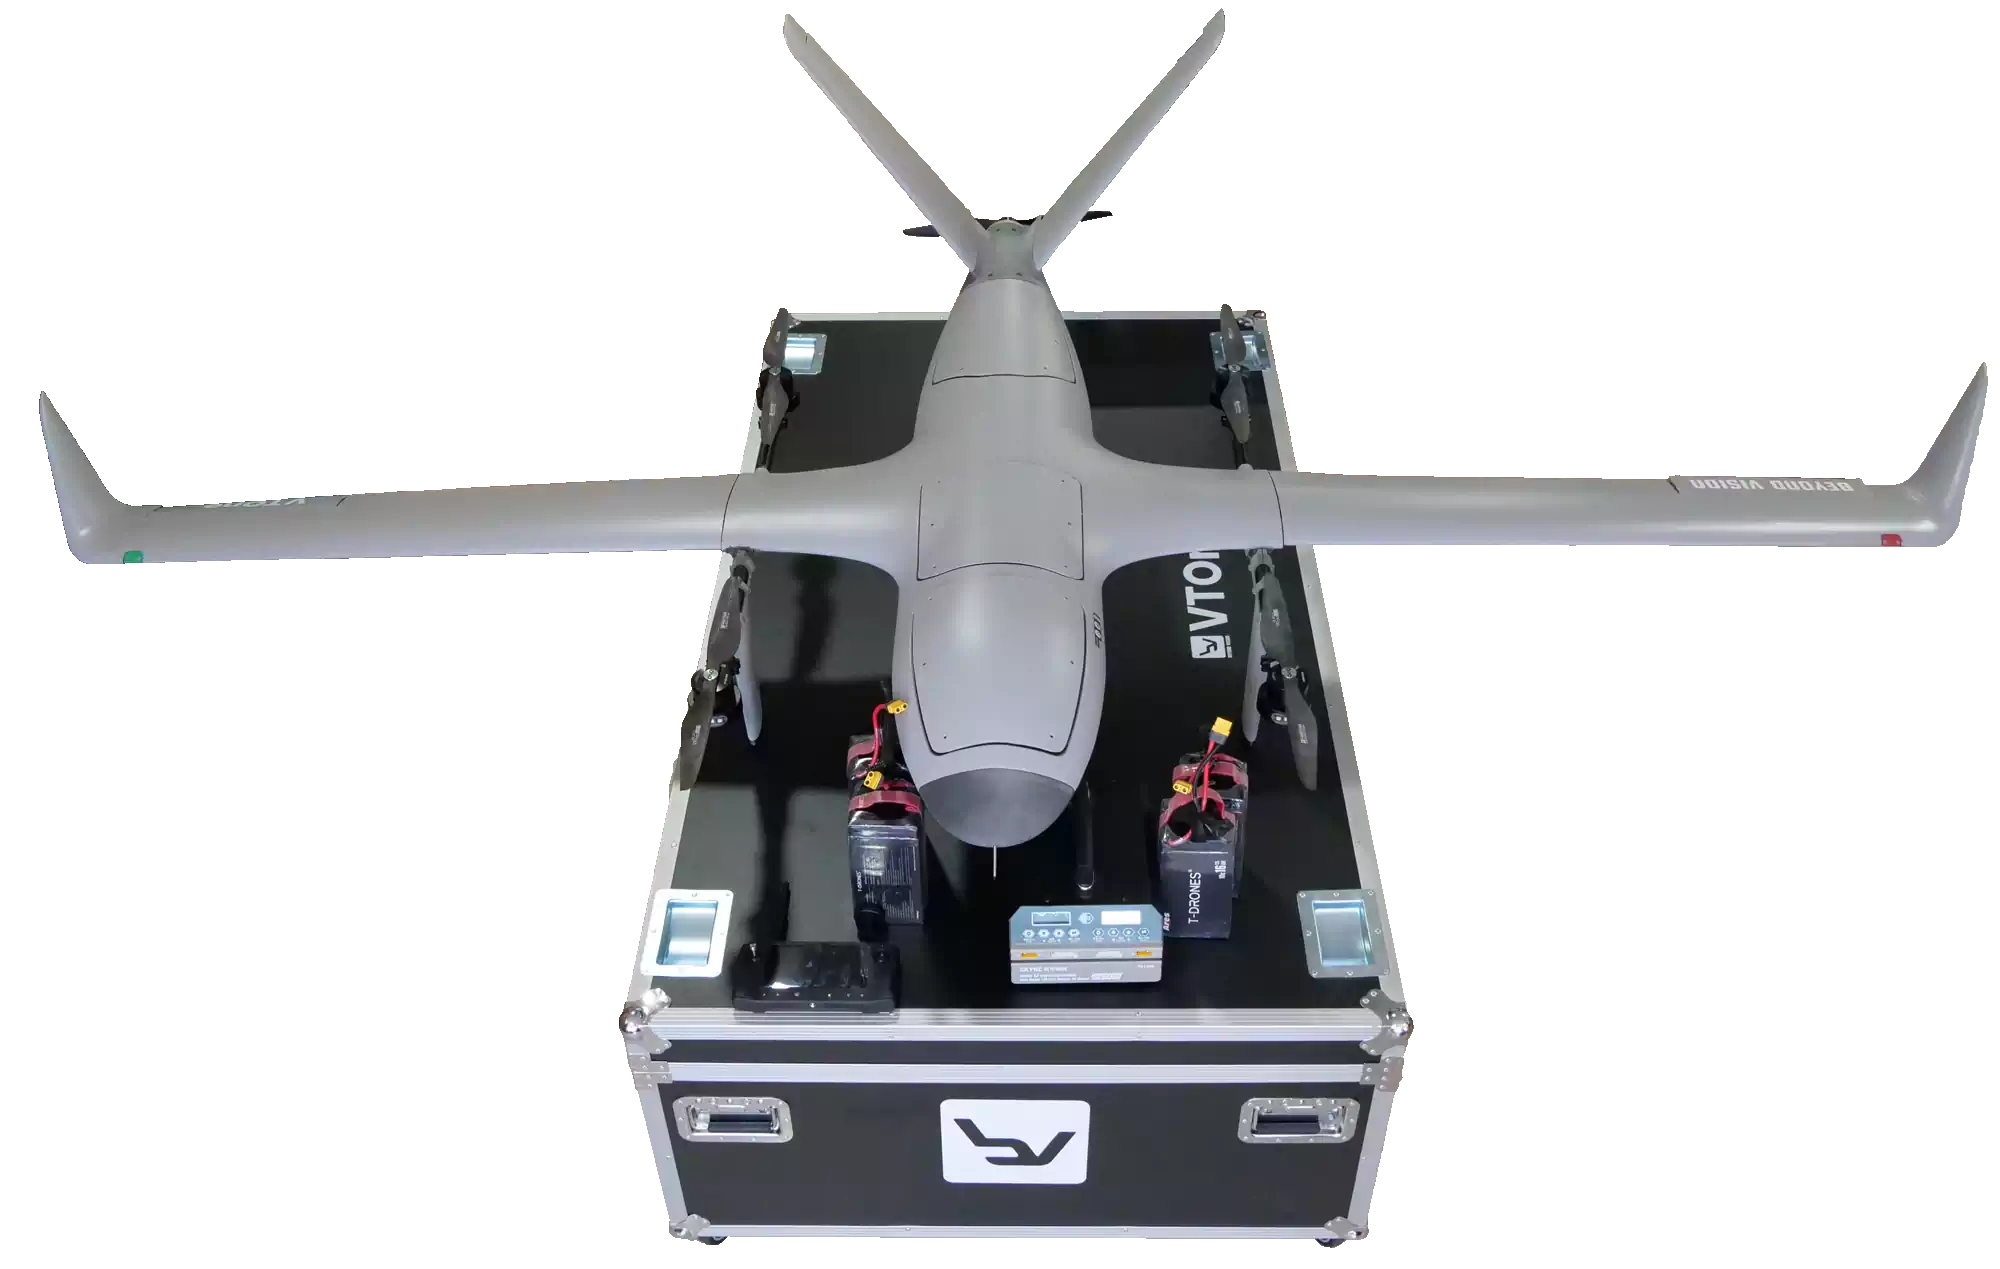
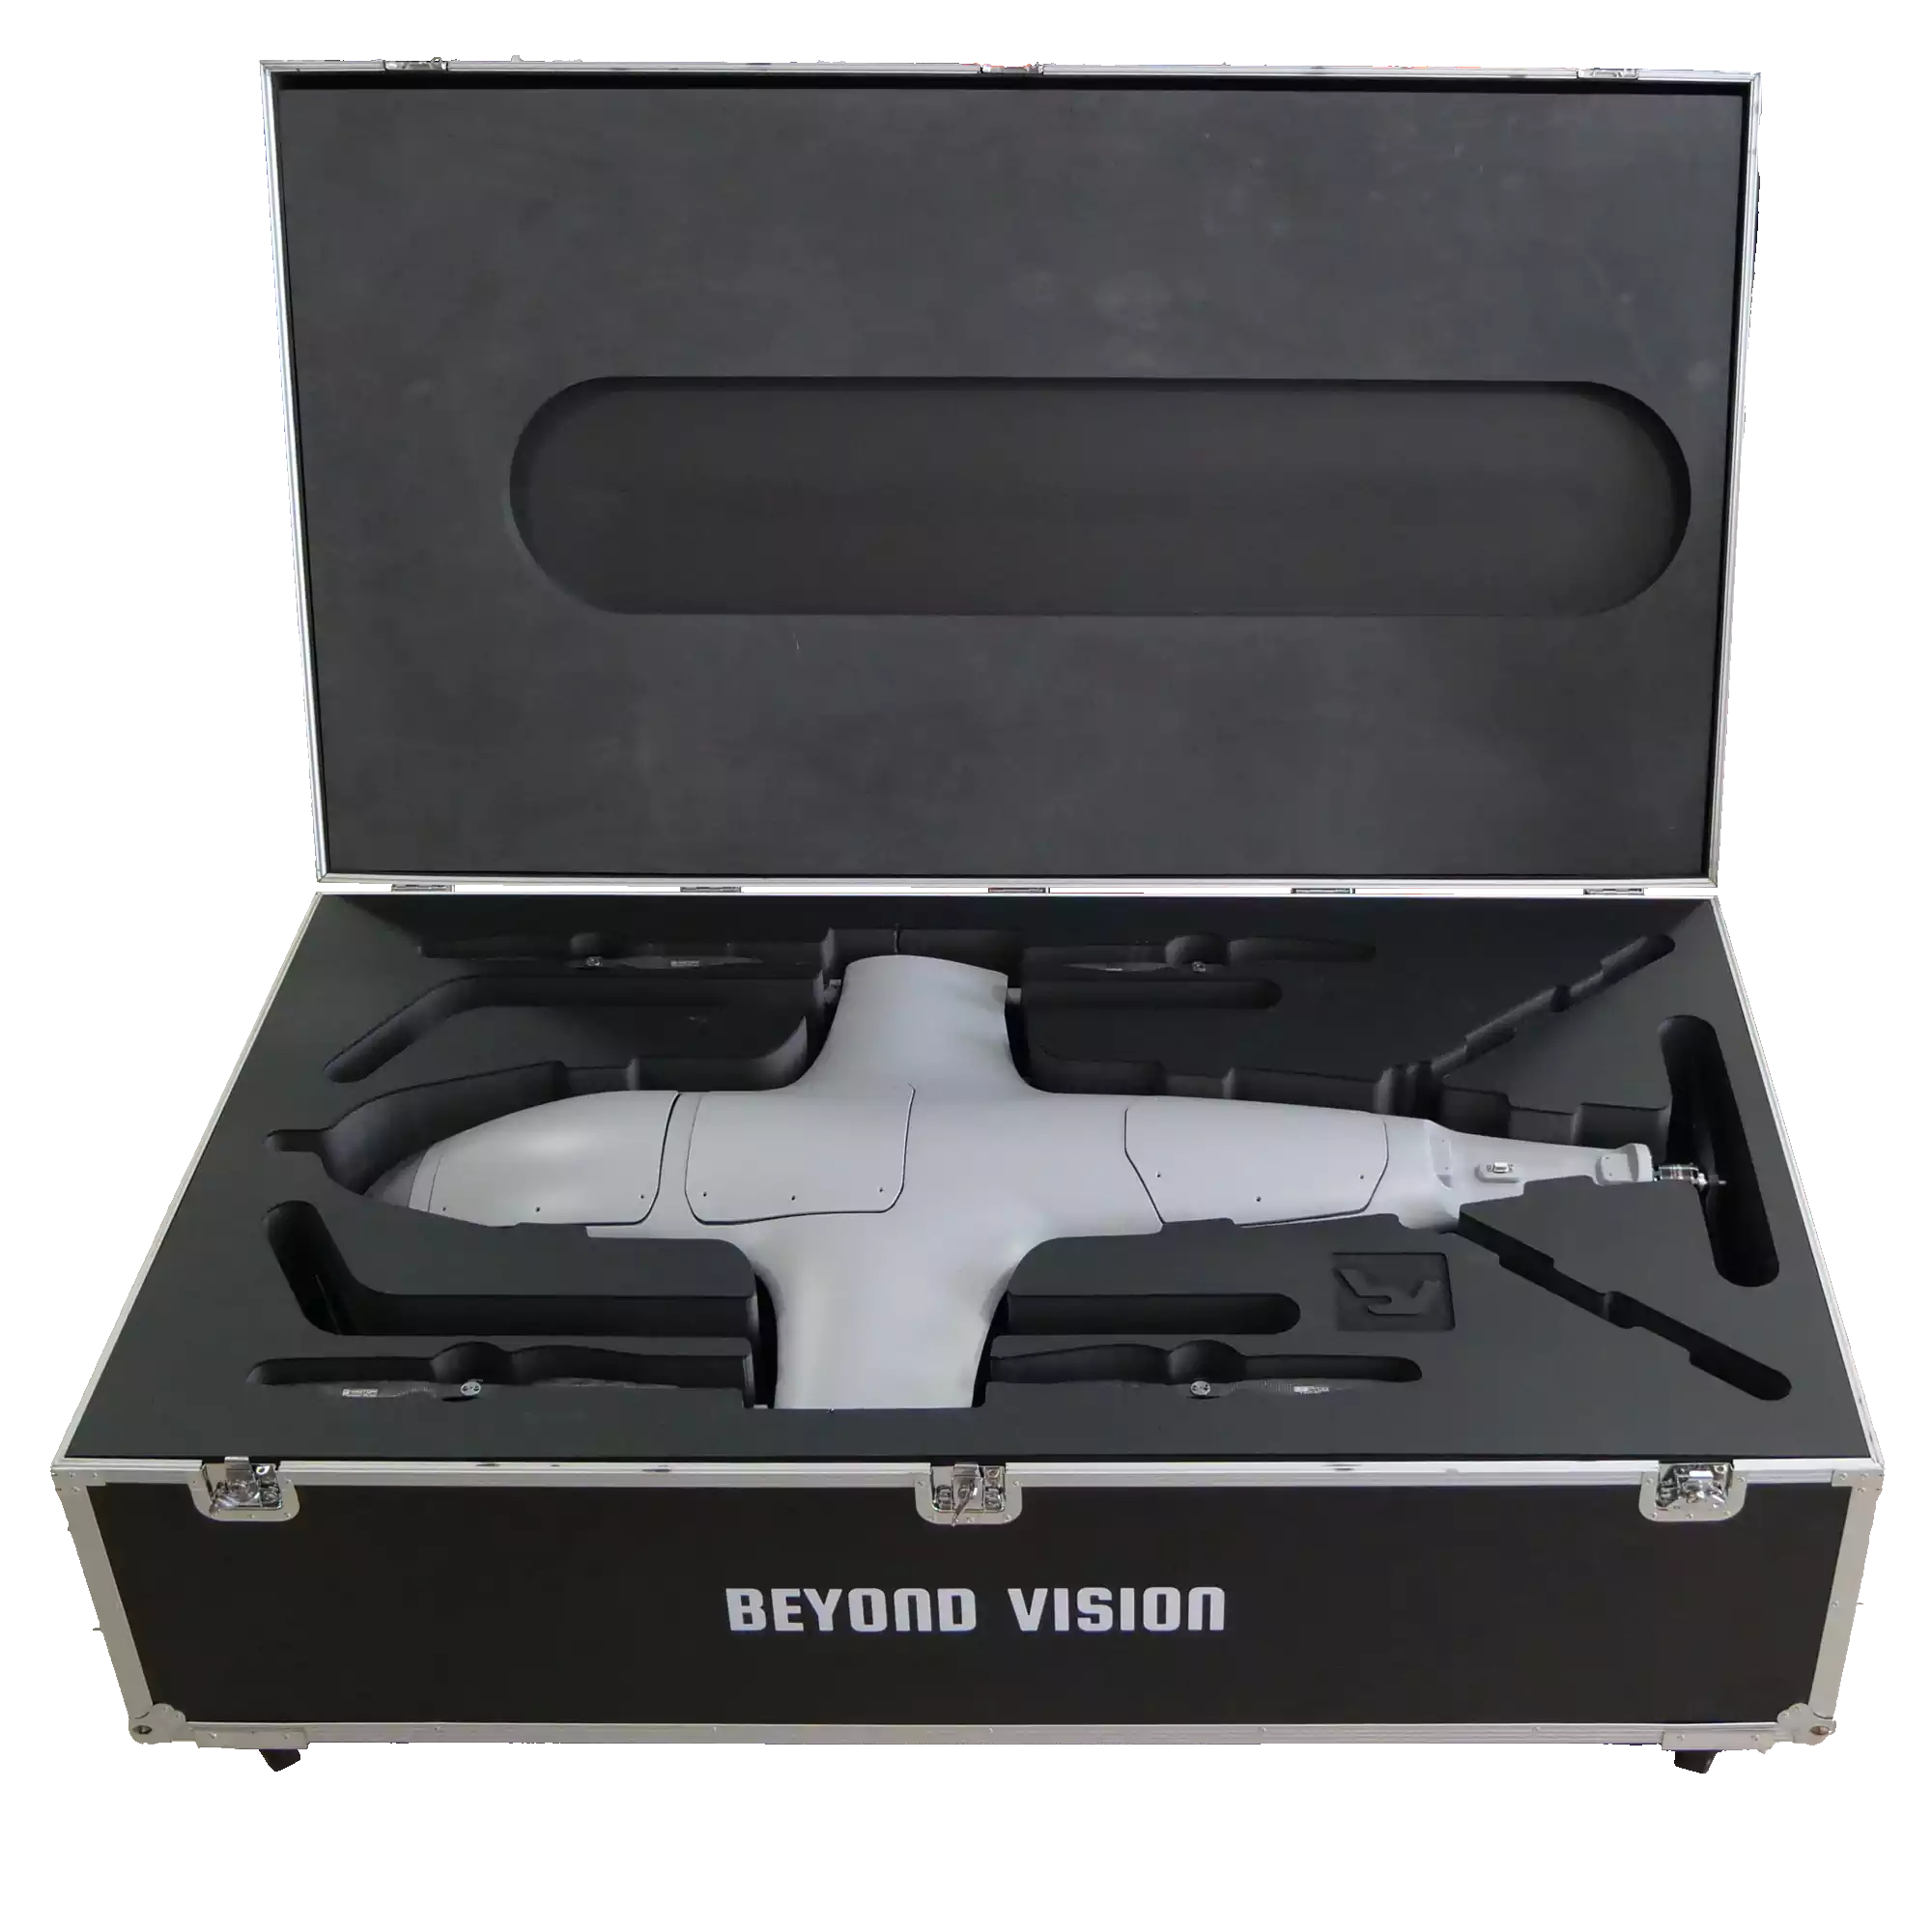
VTONE in transport case: the drone itself. Encased with the 2 wings dismounted, for easier transportation and smaller casing. Please refer to section 2.2 for a more detailed description of the parts;
Operator control: the wireless manual drone control. Please refer to section 2.3 for a more detailed description;
4x VTONE battery: high-density, heavy-duty Li-Po battery that powers up the drone;
Battery charger: main charger and cell balancing station for the Li-Po battery;
If you purchased a beXStream® platform license (one-year access is provided upon drone’s purchase), you will have access to the web application (or desktop app). Please refer to section 3.1 for further instructions on how to register and login using your license.
Ecosystem block diagram
The VTONE is part of an ecosystem that includes the beXStream® platform, local and remote communication networks and accurate positioning systems.
The macro block diagram of this ecosystem can be seen in the following figure:
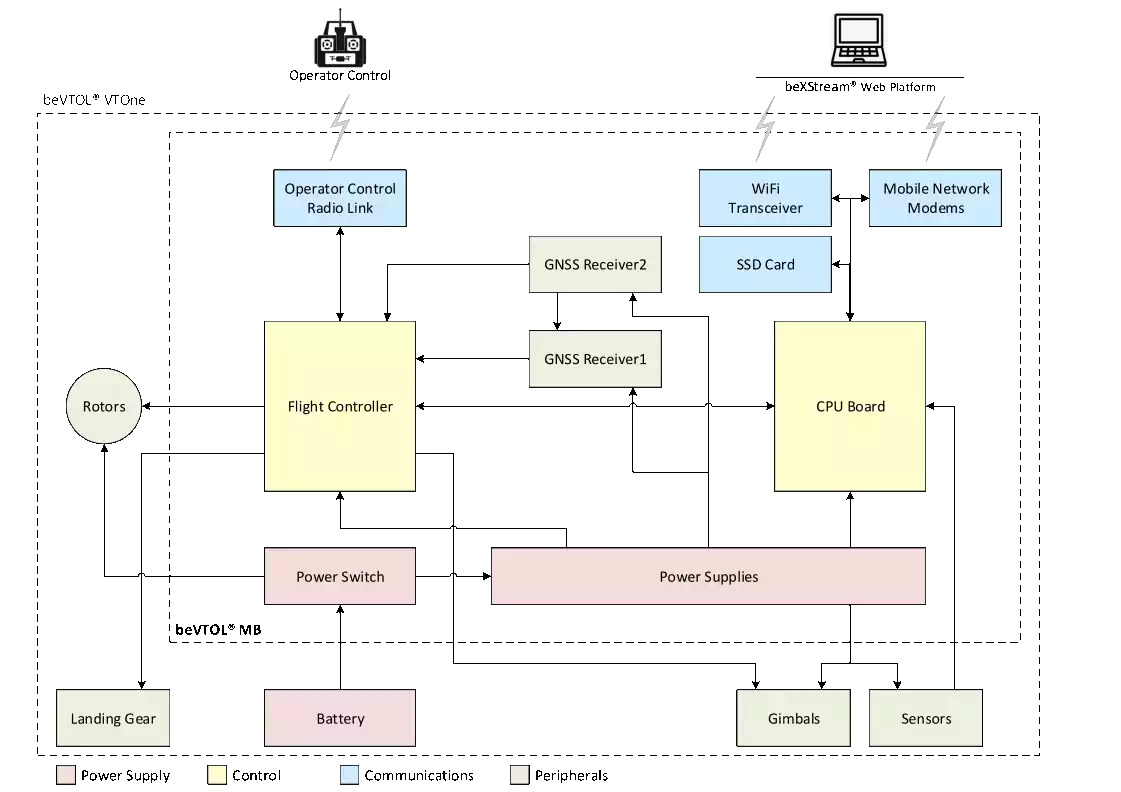
Battery: a dual long-endurance Lion battery that powers the system;
Power Supply: power supply, in charge of generating the needed voltages for the system to work;
CPU Board: the system “brains”, based on a Nvidia Jetson module;
Flight Controller: flight controller module, which controls each of the six drone rotors;
Rotors: the rotors themselves;
Dual GNSS RTK: Positioning module, which includes an INS (Inertial Navigation System), so that the drone can know where it is, where it goes and what is its speed, with a high accuracy; The VTONE features dual GPS RTK modules.
Gimbals: if purchased, the gimbals can be in direct connection with the flight controller;
Sensors: if purchased, the sensors are powered from the drone’s bottom panel and connected to the CPU board via one of the multiple interfaces available;
Operator Control Radio Link: wireless link to the operator control;
RTK Radio Link: wireless link to the RTK base station;
Flight Control Radio Link: if purchased, wireless link to the flight controller (within a certain range, flight information can be retrieved from the flight controller;
Wi-Fi Transceiver: Wi-Fi transceiver module, so that the drone can use the Wi-Fi network (if available) to connect to the system’s web platform;
Mobile Network Modem: mobile network module (4G or 5G), so that the drone can use the network to connect to the system’s web platform;
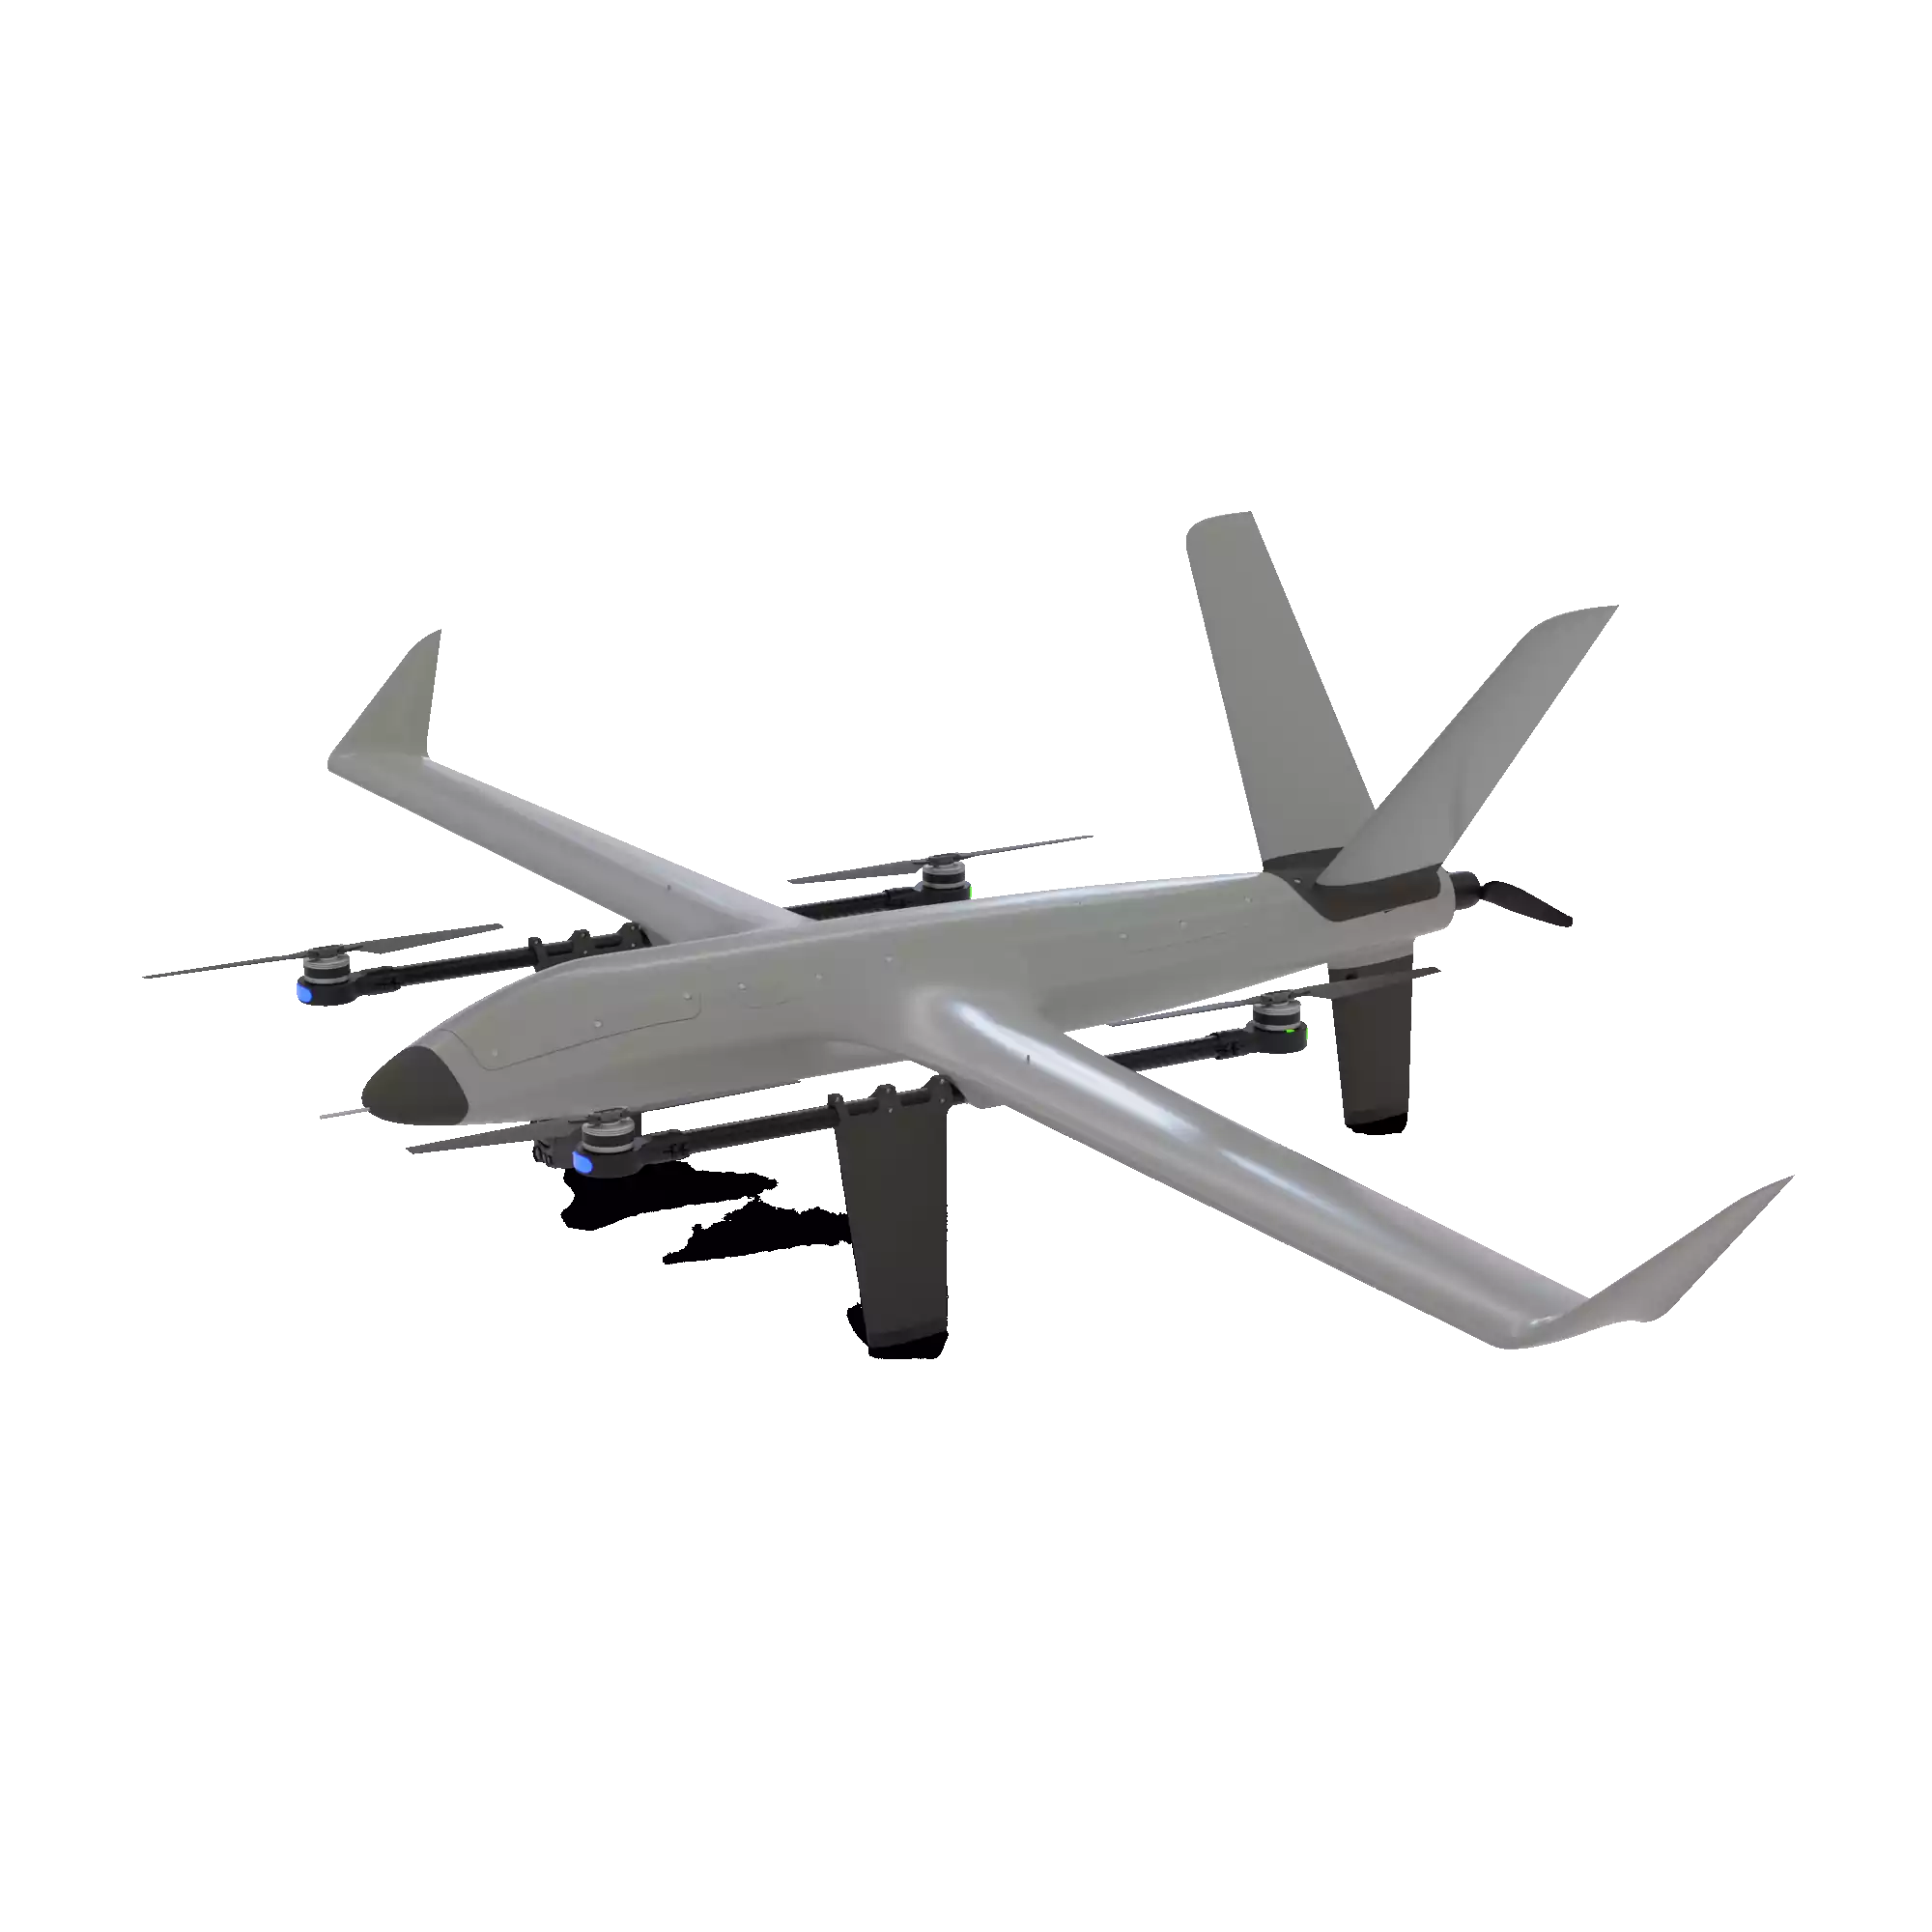
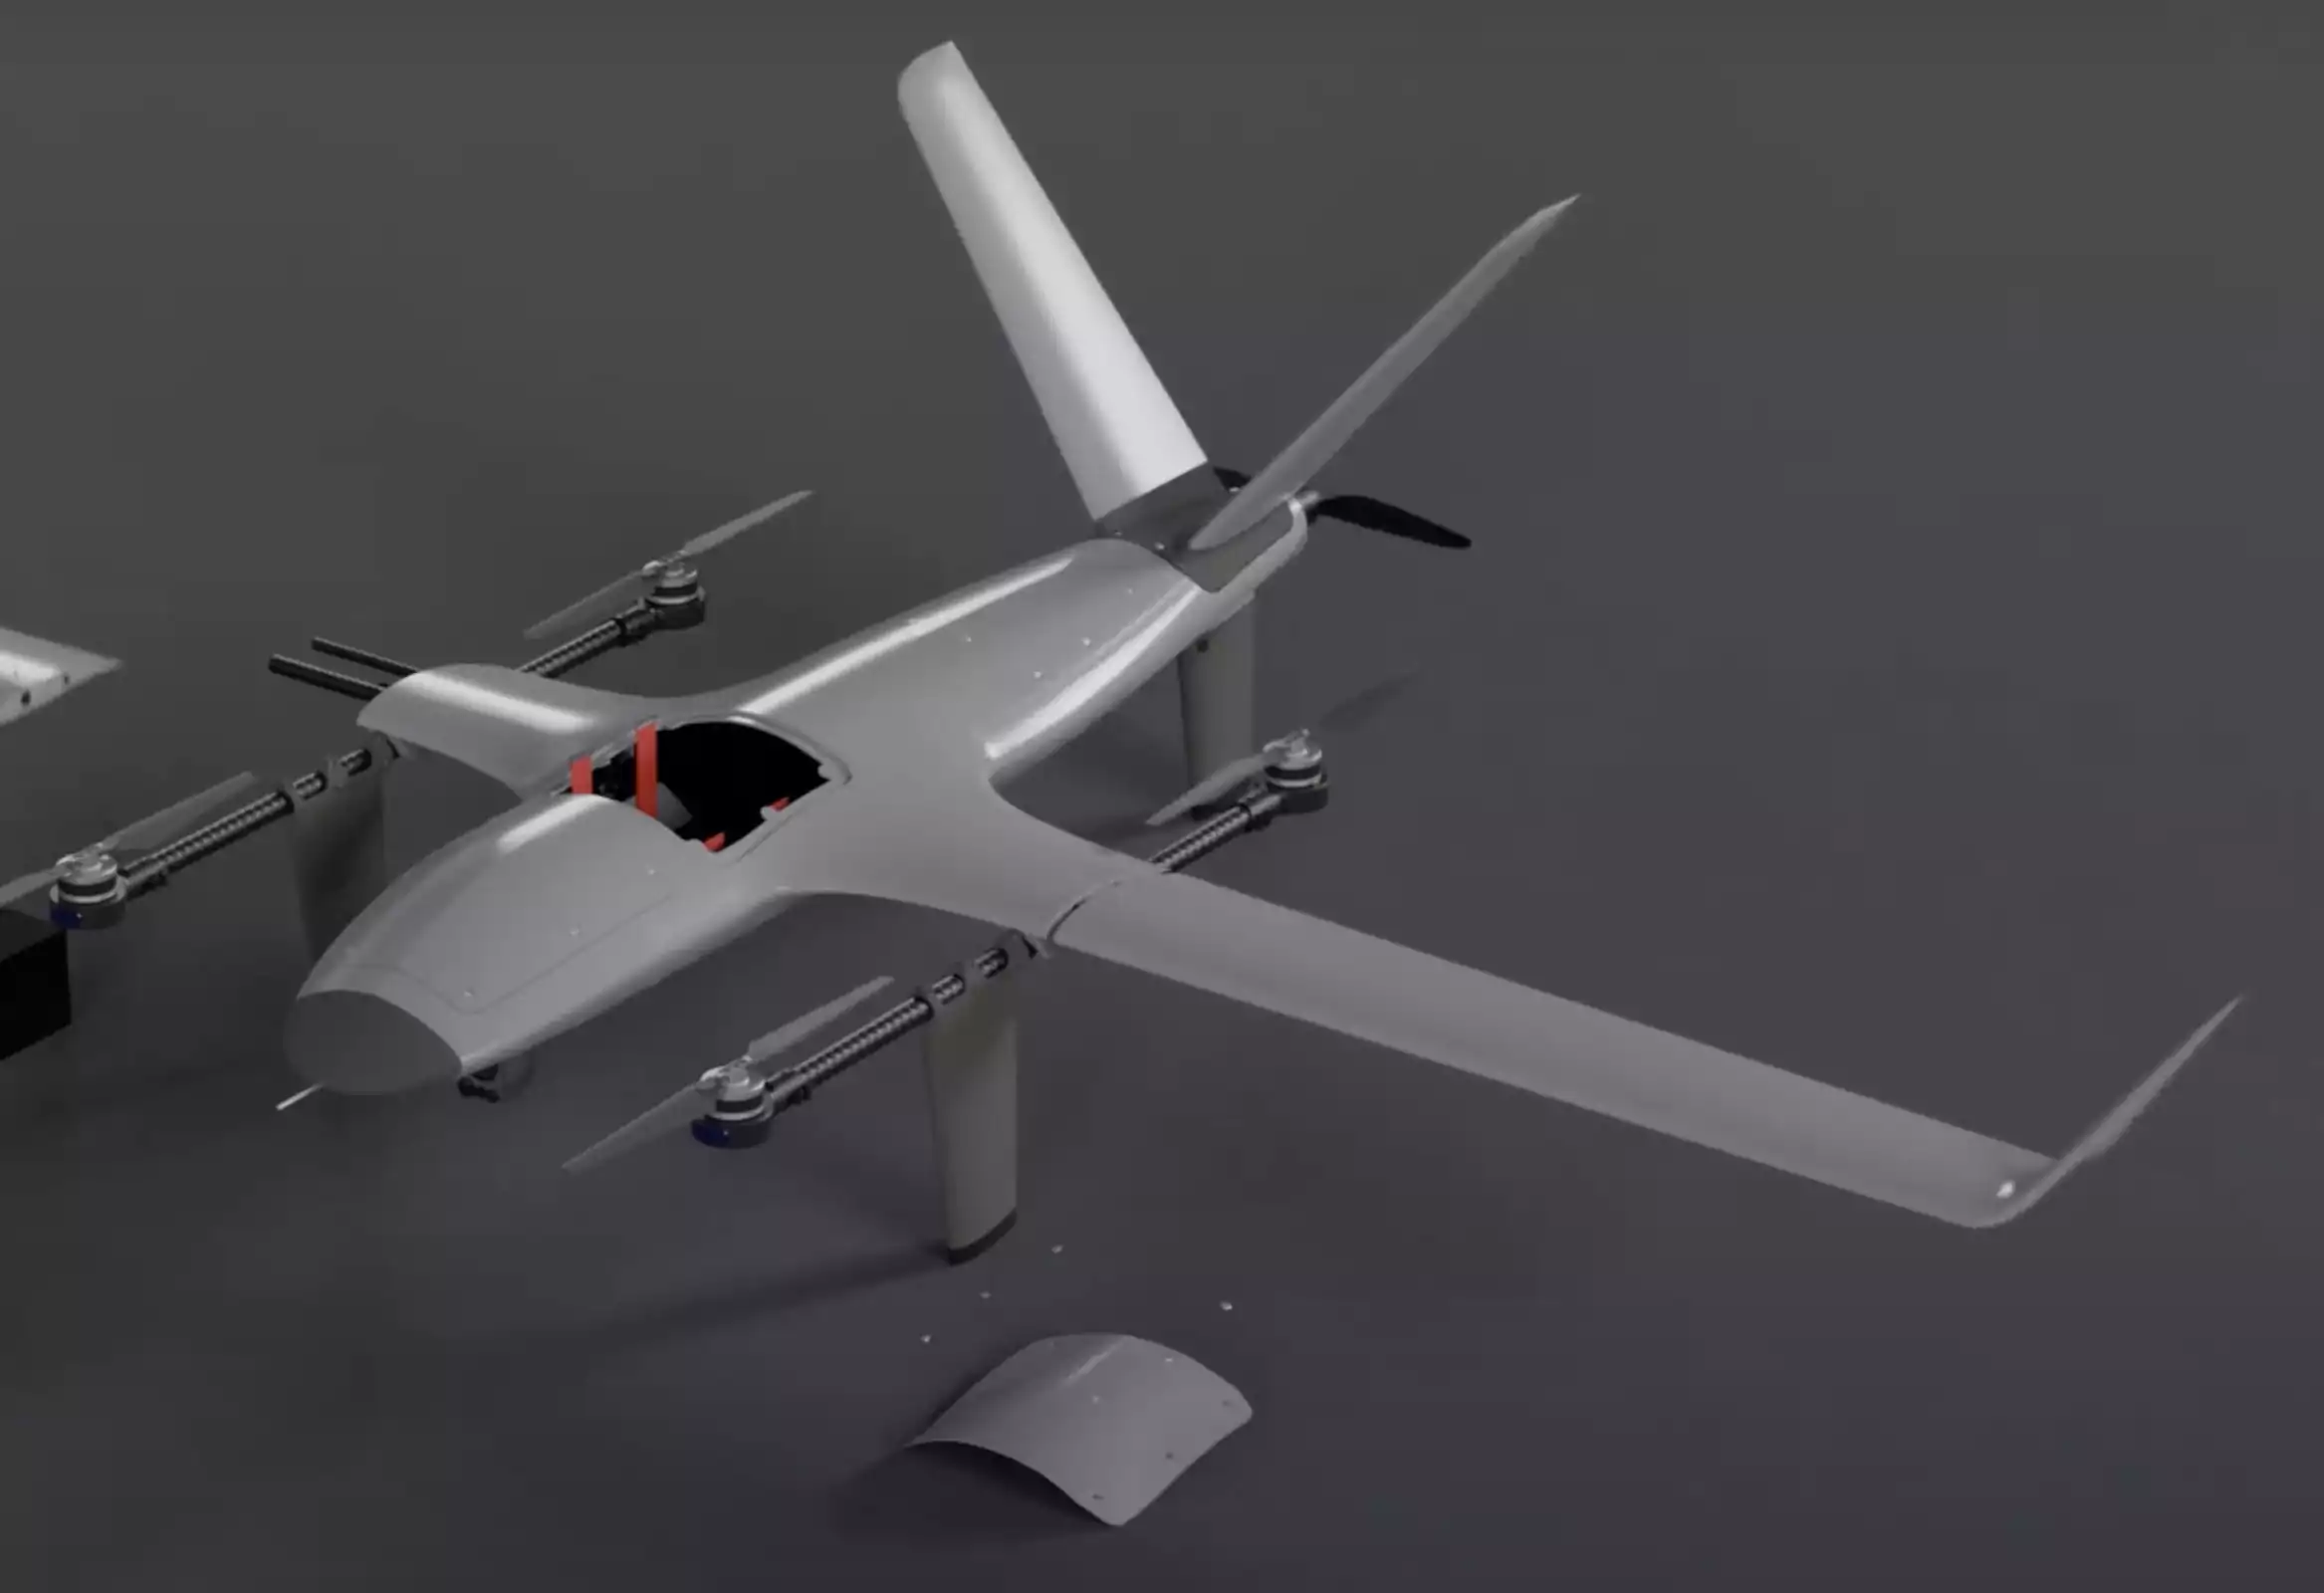
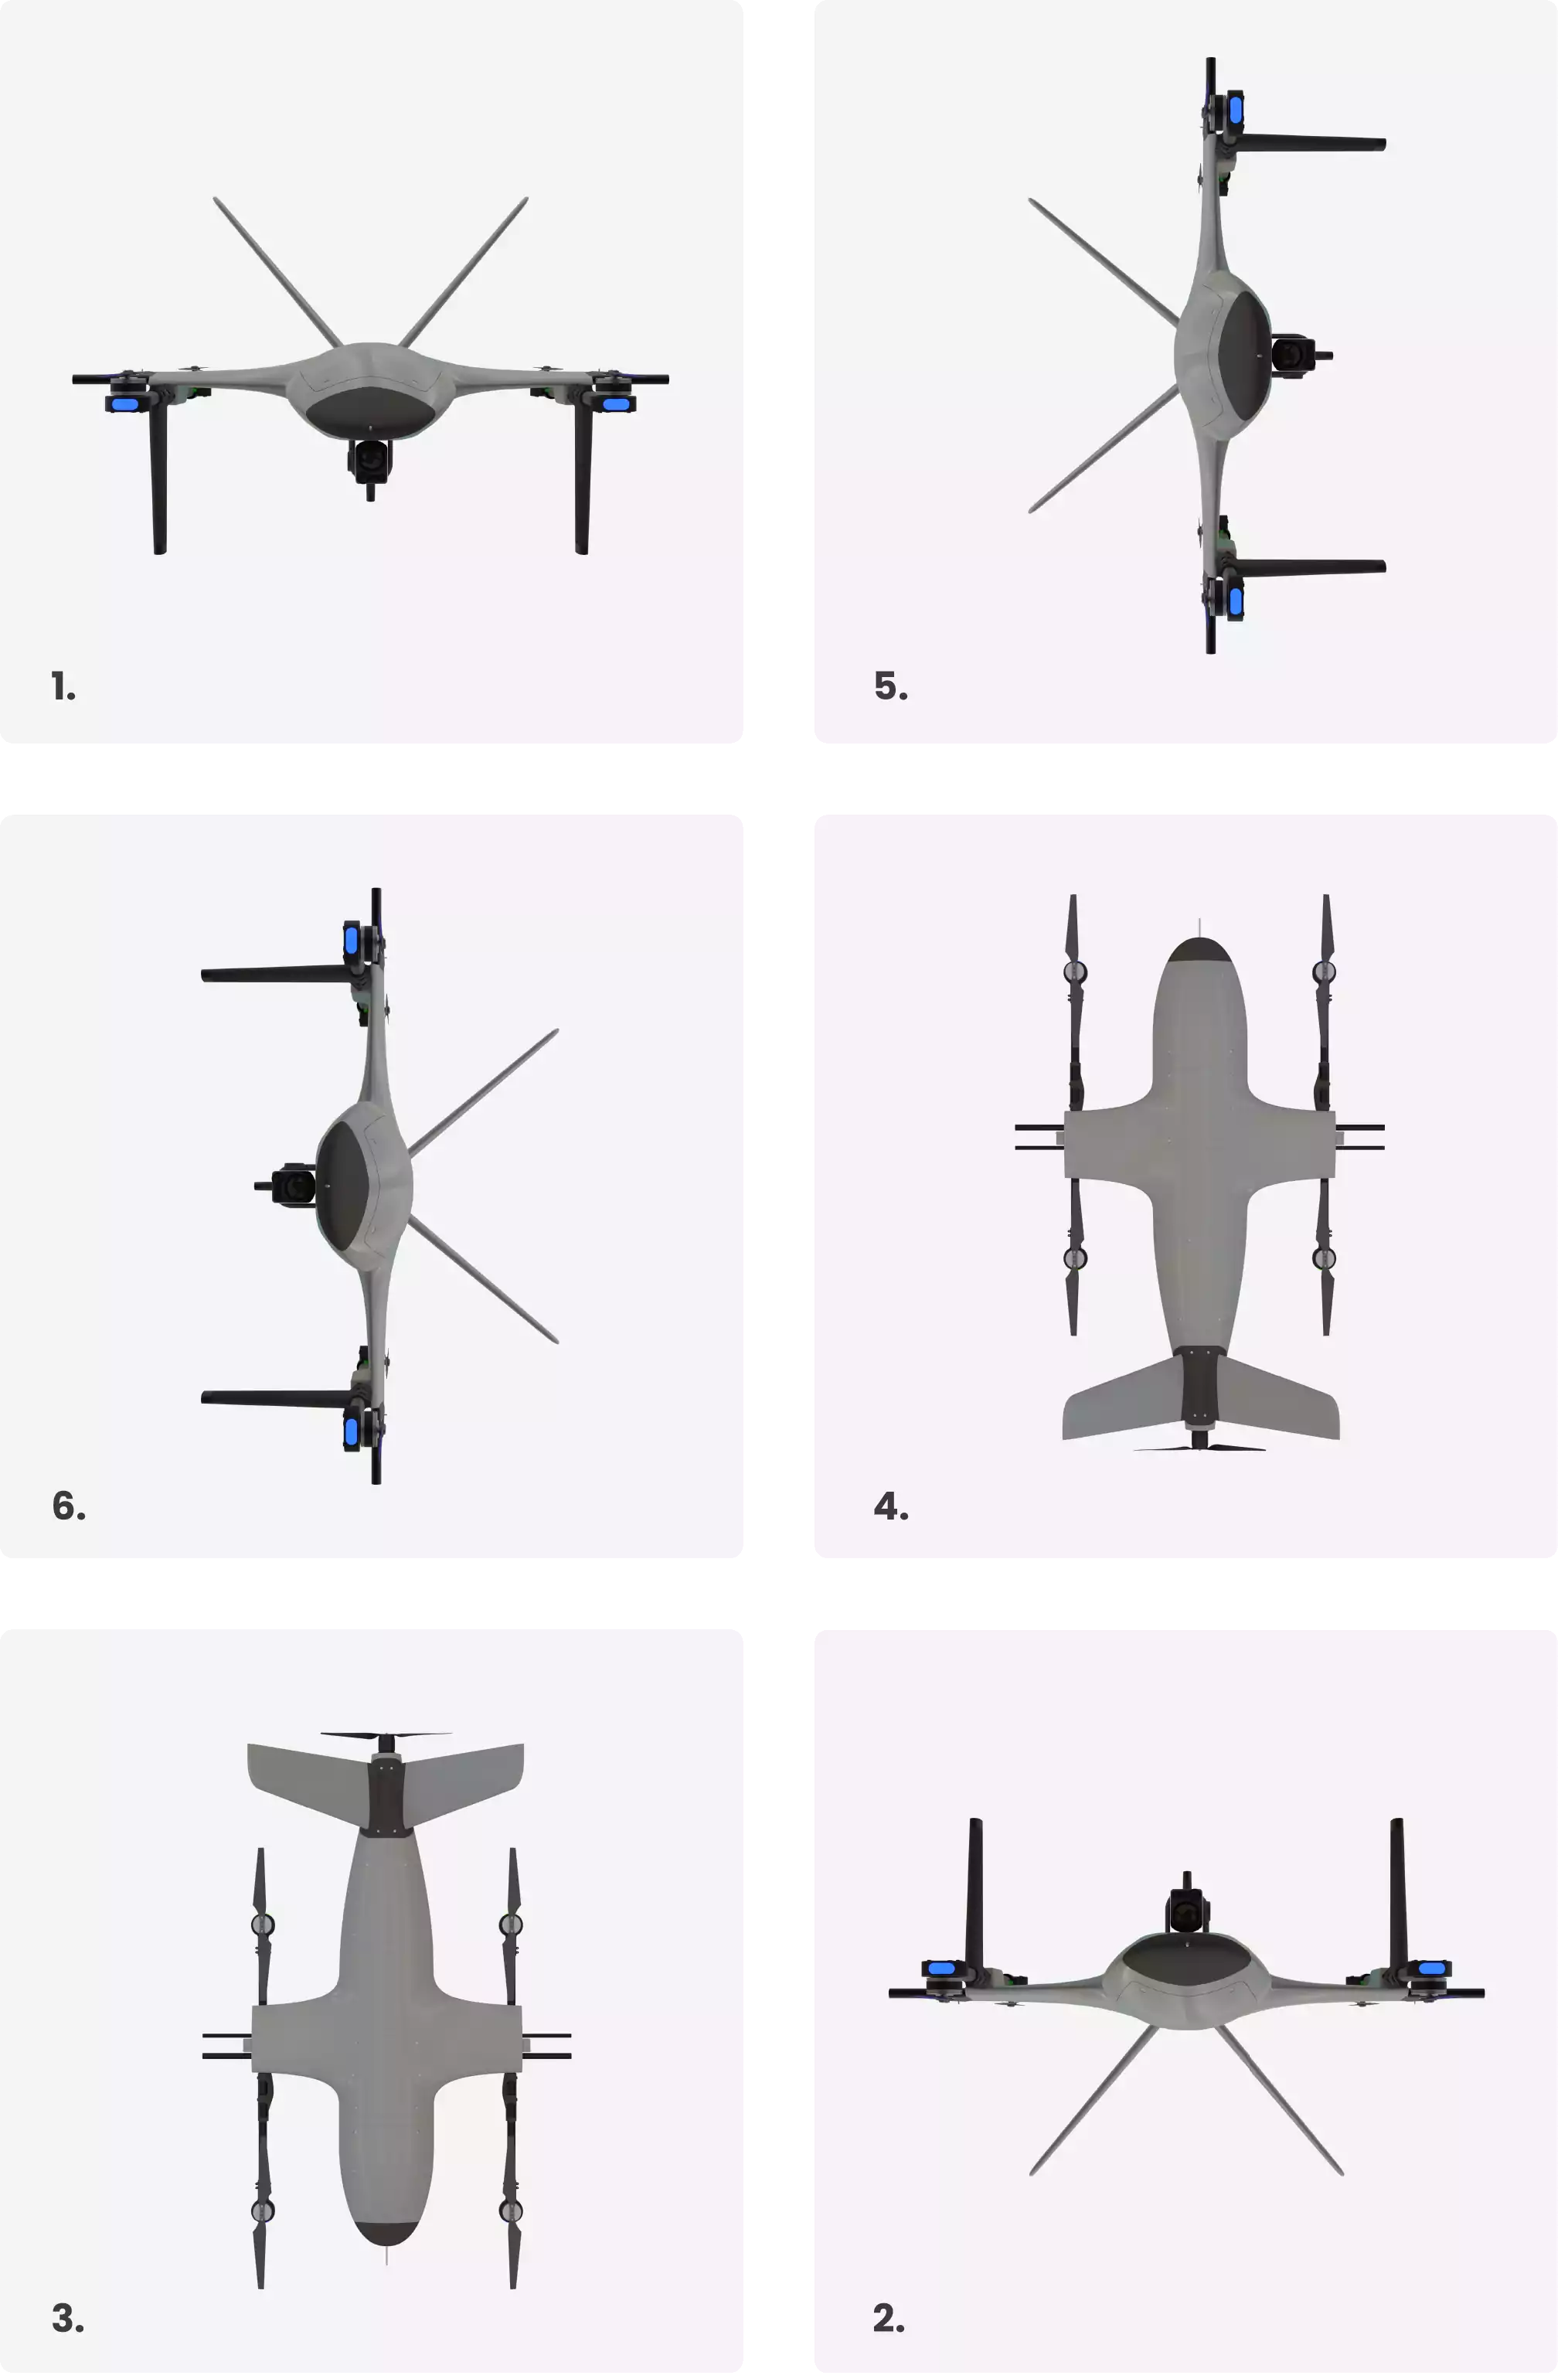
Physically, the VTONE looks like the figure below:
VTONE main parts
It is mainly composed by:
Fixed-Wing Propulsion: Provides forward thrust to propel in fixed-wing mode through the air, achieved using back motor/propeller;
V-Tail: A detachable tail configuration in the shape of a “V,” combining horizontal and vertical stabilizers, used to control pitch and yaw;
Wings: Airfoil-shaped surfaces attached to the fuselage of an aircraft, generating lift as air flows over and under them during flight;
Pitot Rube: A small tube on the aircraft that measures dynamic pressure to determine airspeed; a critical instrument for navigation and control.
Qual Propulsion: propulsion system using four rotors, commonly operated as in quadcopter UAVs to provide lift and control.
Landing Gear: The undercarriage of an aircraft that supports it during takeoff and landing;
On the side front of the drone, one has access to the on/off button, some status indicators and the interface connectors, according to the picture below:
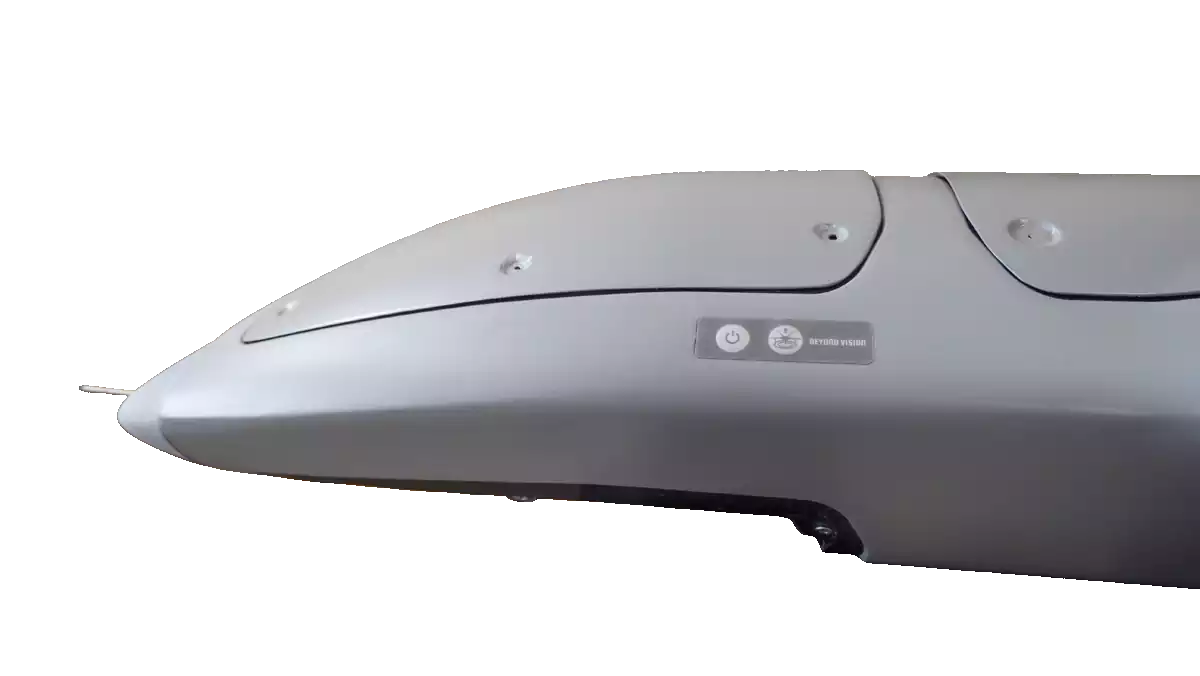
VTONE back connectors and interfaces - in detail:
Power button: switches the drone on or off (this is a toggle button). Please long press the button (4 seconds) to toggle between on and off. This button has a LED indicator to enable the user to check the drone status;
Safety switch: The safety switch can be used by the local user to enable/disable the drone’s safety mode. When in safety mode, the rotors are disabled ensuring that the drone doesn’t fly and the propellers don’t move, preventing accidents;
Operator Control
The Operator Control (also known as RC or Remote Control) allows the operator to control and monitor all aspects of the drone and its operation. This includes piloting, interacting with the attached camera and its gimbal, and building and tracking missions. All while providing the necessary information to ensure a safe and controlled flight, such as drone telemetry, camera’s video feed, environmental information, and more. This can be done with a local drone within the control’s radio link range, or with a drone anywhere in the world, as long as both the drone and the controller have access to the internet. The picture below shows the front view of the Operator Control, which is composed by a touch screen, two joysticks for piloting the drone, a wheel, and six buttons.
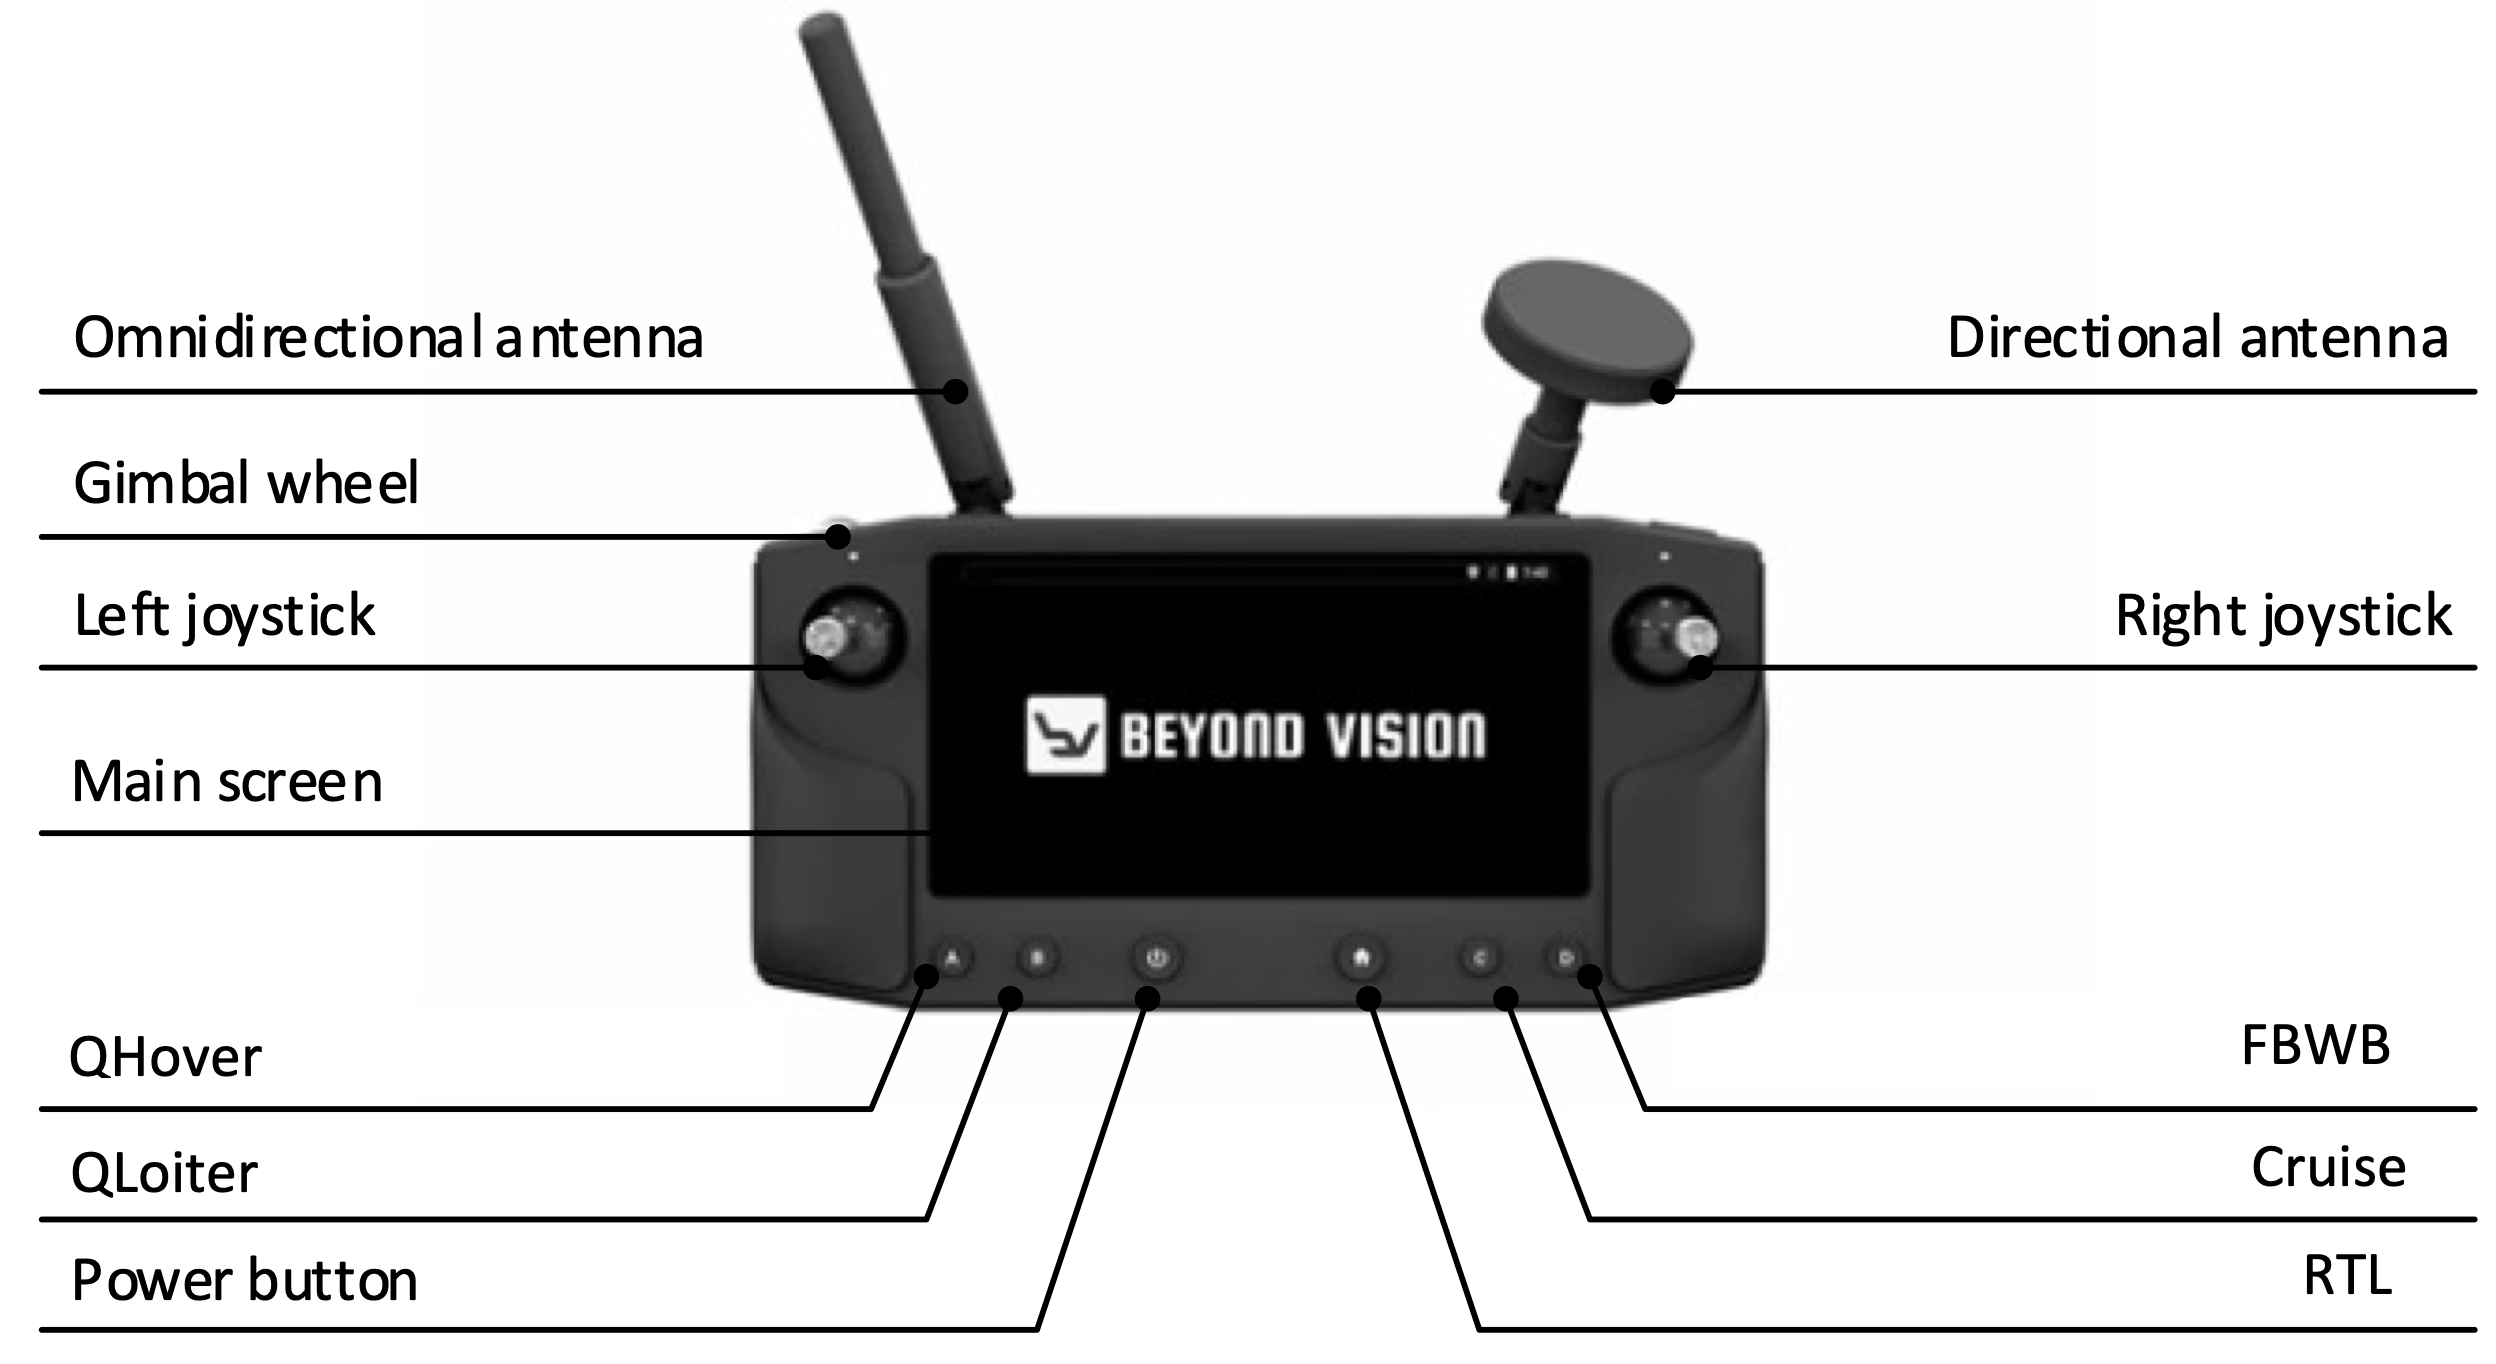
The main interfaces can be described as:
Directional and omnidirectional antennae: Antennae that establish the wireless connection between the Operator Control and the drone;
Left joystick (up/down): Drone’s throttle control;
Left joystick (left/right): Drone’s yaw control;
Right joystick (up/down): Move the drone forwards/backwards;
Right joystick (left/right): Move the drone sideways;
Main screen: Displays information for the user and provides additional actions (see next sections for further details);
Button A: Cine mode 1;
Button B: Position mode 2;
Power switch: Switches the device on/off;
Land: Commands the drone to land immediately;
Button D: RTH (Return To Home) command. This button commands the drone to return to the point where it took off;
Gimbal wheel: Controls the primary gimbal’s pitch movement;
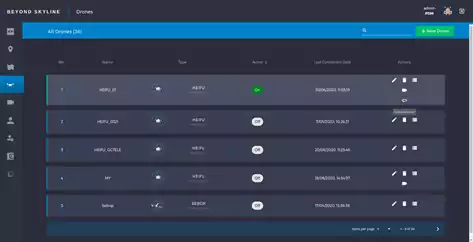
When you open the app, you should see the following menu:
Safety information
The VTONE is equipped with state-of-the-art technology and it was developed having safety as one of its primary concerns.
However, the VTONE is not a toy and should not be handled as one. Individuals under the age of 16 are not be allowed to manipulate this drone, as failure to comply with some safety requirements can result in serious injury for the person handling the drone and others around. It can also result in severe damage to the drone or even complete loss of the equipment.
Moreover, starting from 2021, new rules developed by EASA were released and apply to the usage of drones across Europe. Please check European Commission Delegated Regulation 2019/945 (https://www.easa.europa.eu/document-library/regulations/commission-delegated-regulation-eu-2019945) and confirm that you have the necessary conditions to fly, especially if the flight you are about to perform doesn’t comply with the conditions stated for the “open-category”, which exempt you from having to submit official operational documentation in order to get the needed authorization to fly (https://www.easa.europa.eu/domains/civil-drones/drones-regulatory-framework-background/open-category-civil-drones).
Also, please read carefully the following safety guidelines before you start using your drone, as these will surely help a safer and more enjoyable flight.

NOTE: These are only safety guidelines and can be superseded by local laws and regulations if there are any.
General risks concerning the usage of flying vehicles
When using flying vehicles, the user should be aware that this type of vehicles can inherently pose a set of risks related to the condition of flying, namely:
Spinning propellers: in order to be able to fly, the VTONE has five rotors. Close contact with the spinning propellers when they are moving can result in serious cuts, damage of goods and damage of the VTONE itself and shall always be avoided;
Collision: whether with ground objects (buildings, power lines or other infrastructures) or flying ones (planes, birds, other flying beings), there are always a probability of collision that shall be thoroughly considered before flying as this can cause serious damage to the VTONE and the other obstacle. Namely, if in the air, it can cause the fall of both;
Fall: Even considering the redundancy of the VTONE flying sensors and actuators in order to guarantee that it doesn’t fall, there is always a risk of falling, as there is with any flying object. So, flying above crowds, lines of water or other sensitive objects shall always be avoided;
Legal boundaries: Every country has its no-fly zones. It is very important that the operator does everything in his/her power to avoid these no-fly zones, as they usually mark high-risk or restricted air space.
The following sections describe in detail how to avoid these risks.
General safety guidelines
Weather: Try to always fly only in moderate weather conditions. If the weather is not ideal but you still need to fly, please refer to appendix A.1 (under environmental specifications) to check on the drone limits and ensure that it is safe to fly. You should never try to fly under severe weather conditions like heavy wind or rain, fog, snow and lightning.
Fire accident: Unless you have fire extinguisher equipment, you should not come close to the equipment or try to extinguish the fire in the case of a fire accident;
Before flight checklist: Always, use the provided pre-flight checklist (section 5.1) to confirm that everything is in order before the flight.
Keep safe distance: The VTONE is a hybrid VTOL flying device and as such, it is important to keep a safe distance from the drone. You should always keep a safe distance from it (at least 5m) if it is activated and ready to take off.
Local regulations: Respect the local laws and regulations, namely the ones regarding flight limits and no-fly zones, as non-compliance with these regulations can result in civil and/or criminal prosecution. It is of particular importance that you don’t fly near airports, helipads or military facilities.
Rotors stop: Never stop the rotors during flight unless in an emergency situation (see section 6.5), as the drone will most certainly crash.
Manual operation safety guidelines
While flying in manual operation mode, please keep the following guidelines in mind, unless you have an authorization to fly under a category other than EASA open-category.
Line-of-sight (LoS): Always keep the drone within line-of-sight at all times and at an altitude below 120m AGL.
Open-field: You should try to always fly in open-field, with good satellite visibility, to ensure that the drone has the best instrumentation conditions for its flight. You must also keep a distance of at least 150m from residential areas and far (at least 30m) from other people.
Always alert: Maintain a good surveillance of the drone at all times during the flight. Also, ensure that you are not under the influence of alcohol, drugs or other substances that might affect your capabilities.
Physical obstacles: Always ensure that the drone is not flying over power lines, tall trees and other obstacles. Also, you should avoid bodies of water, as the drone is not prepared to land on water.
Power lines: Areas with high-voltage power lines are areas to be avoided, as the strong magnetic fields can influence and confuse the sensors on-board.
NOTE: If the flight controller senses a low battery level,
it beeps and immediately tries to land wherever it is. This is a safety
procedure and it is normal. However, you should ensure that the drone is
always flying above open terrain, so it can land safely.
Maintenance safety guidelines
You should respect the maintenance guidelines of your drone to ensure that it is always in good shape for flying. The following are general maintenance safety guidelines. Please refer to chapter 8 for further maintenance instructions.
Spare parts: Always use original VTONE spare parts (please refer to Beyond Vision’s technical support contacts in chapter 1 to check how to order spares). Moreover, you should always ensure that you only use parts that are in good condition. Namely, the usage of aged, broken or chipped propellers puts the whole equipment at risk, as these may fail during the flight.
Batteries: Caution must be taken not to overcharge or over discharge the batteries. You should also make sure that the batteries of the drone and the Operator Control are fully-charged before each flight. You should not use batteries that already failed or were over discharged as this increases the chances of failure during the flight, putting the equipment at risk. You should also always use batteries provided by Beyond Vision 3. The batteries used in VTONE have a specific casing that is designed to fit inside the tray.
Warning
Please be aware that failure to comply with the safety guidelines and recommendations can affect not only yourself, but others around you. Ensuring that you do whatever you can to avoid an accident is part of your civil responsibilities.
Drone setup
In order to prepare the drone for its first flight, you should follow the instructions below. You don’t need any additional tools besides the ones that are provided by Beyond Vision drone kit.
If you’re seeing this in a digital form, you can also look the video on the following link:
Start by unpacking the VTONE kit contents from the provided case;
Before any flight, you should confirm that the batteries are charged. This is especially important before the first flight. Please follow the instructions of section 8.1 in order to charge the batteries;
Afterwards, you can assemble the back tail of the drone. Place it, and screw the four screws that lock it in place
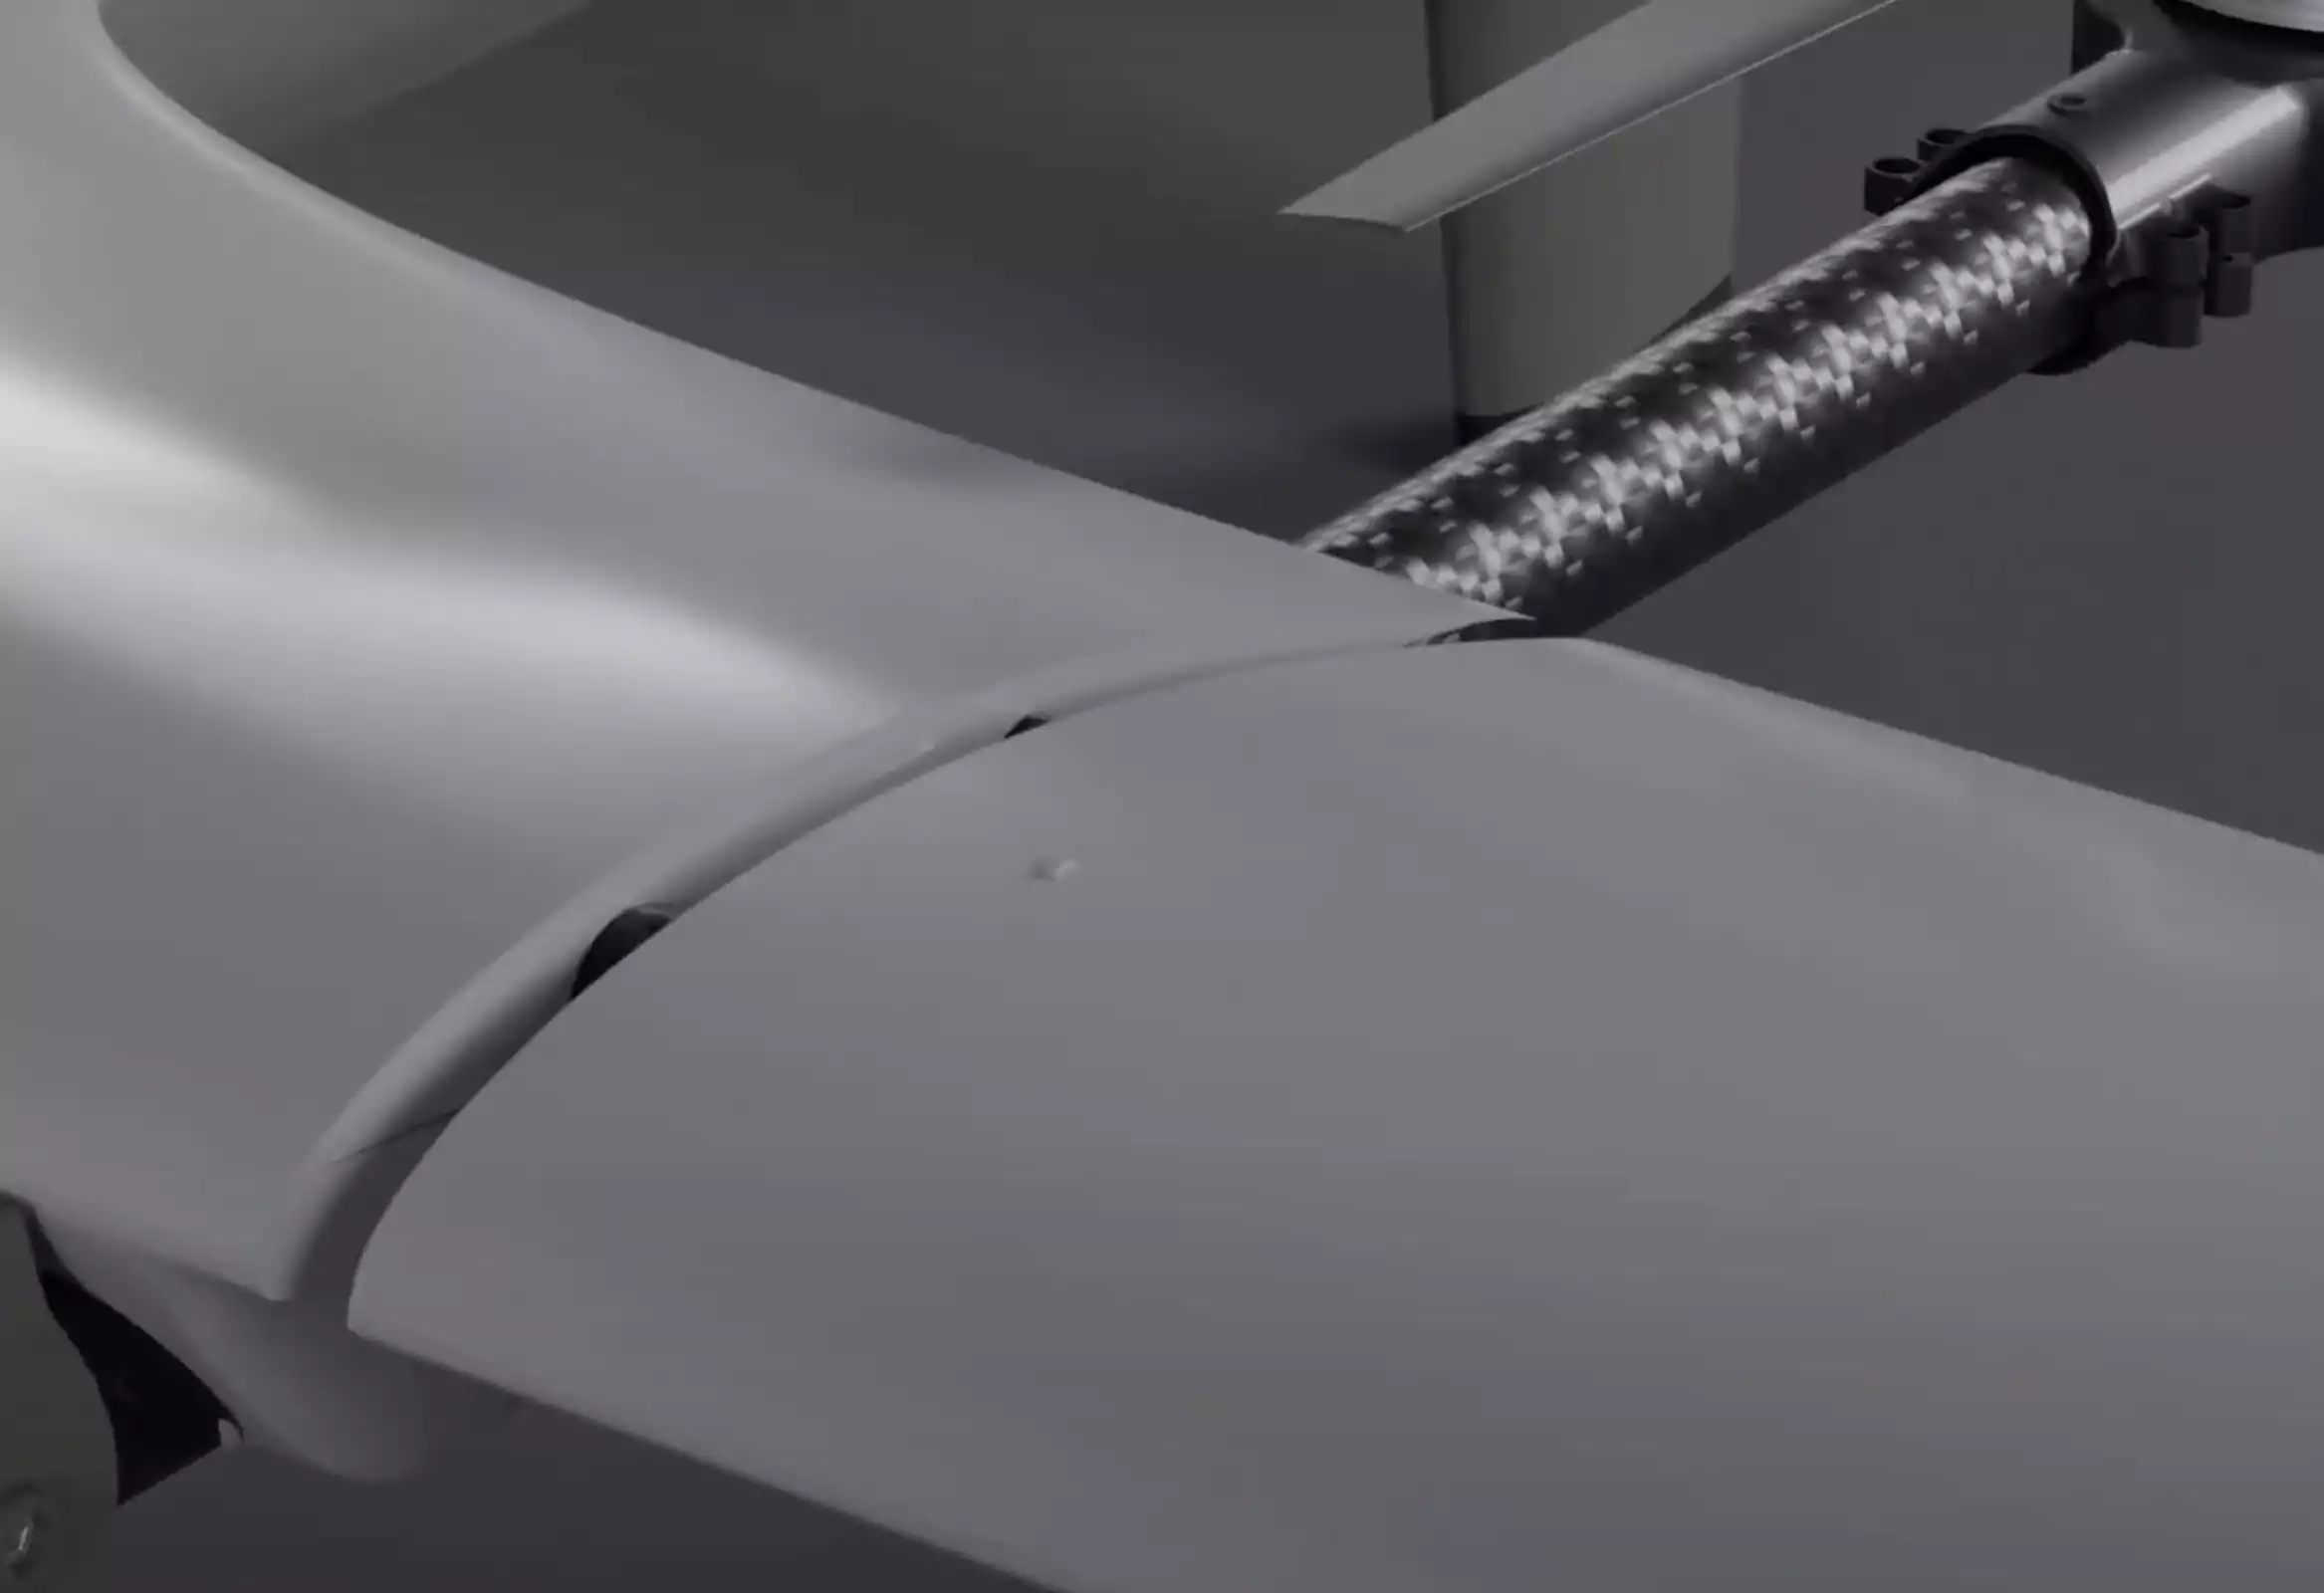
Attach both wings to the drone as in the picture below (gently push them until you see the lock up, signalling the end-of-course):
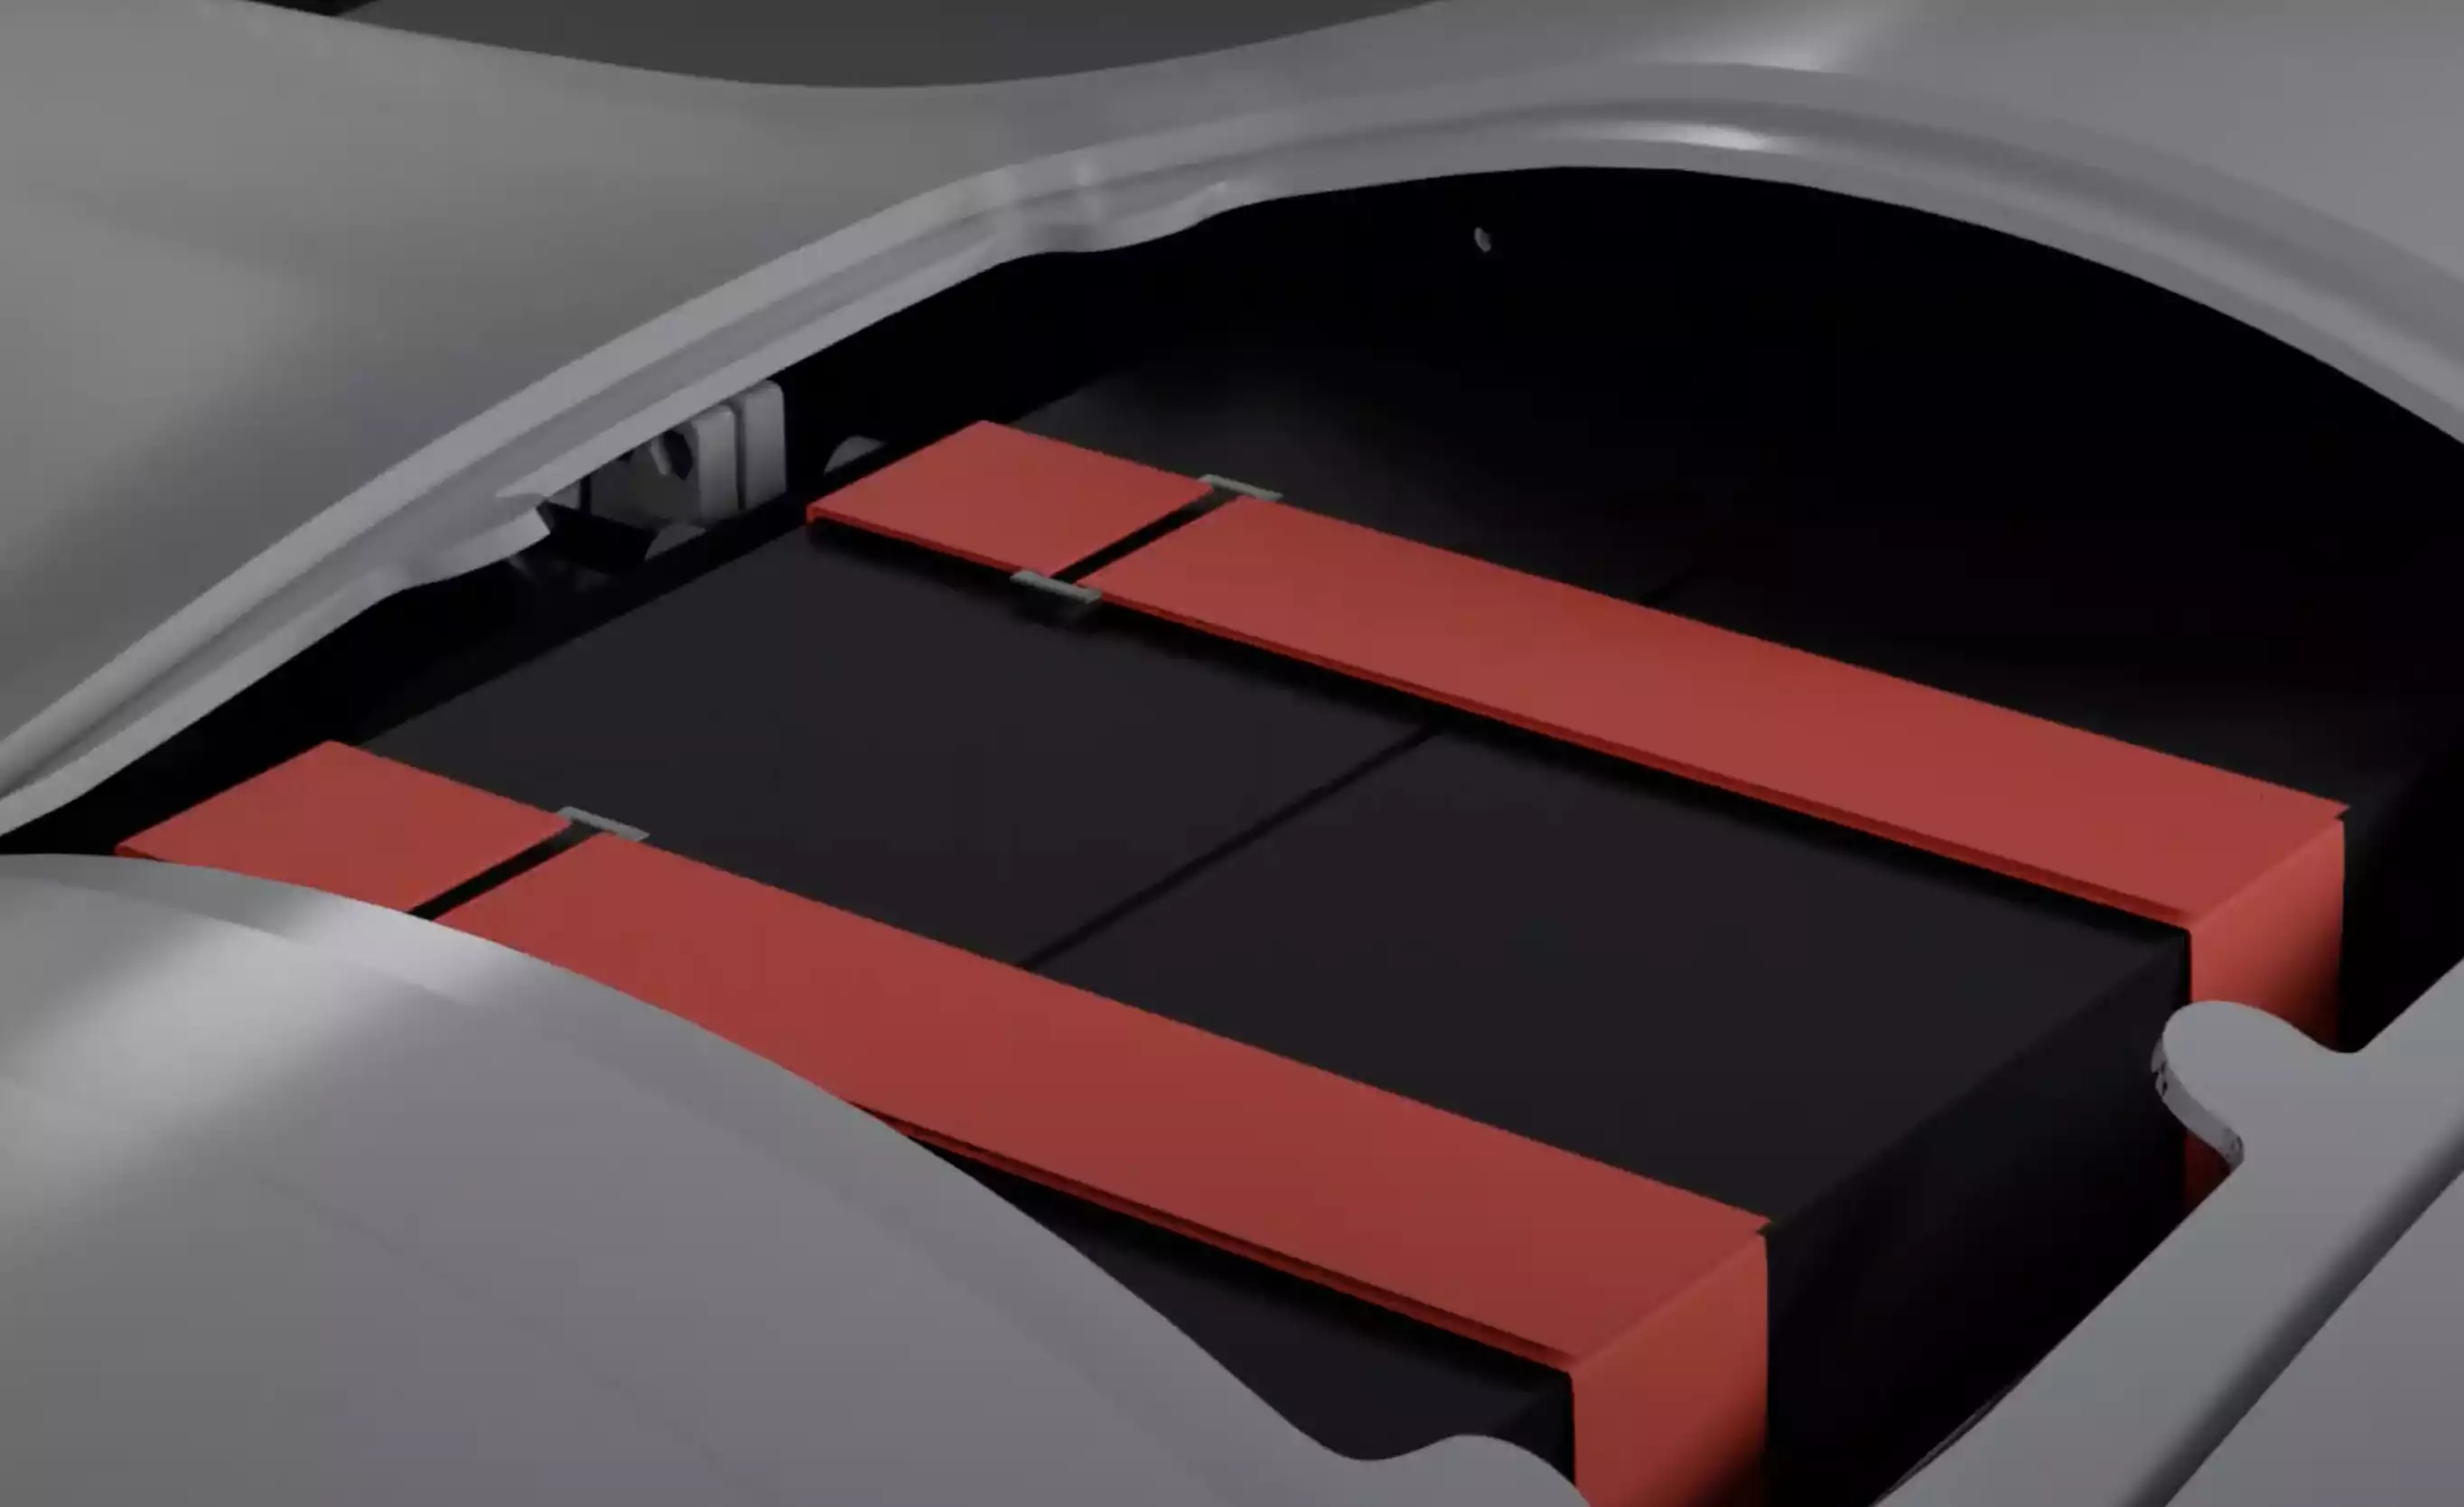
Place the battery in the battery compartment (strap them with both bands):
Turn on the drone (push the on/off button for 4 (four) seconds). The on/off button shall turn the LED on and power up. Please wait a few seconds, until you hear the flight controller melody, showing that it successfully powered up and everything is ok (refer to the troubleshooting chapter if this doesn’t happen).
The flight controller needs to be calibrated at this stage for its best performance. Please follow the steps provided in section 4.3 to perform this calibration.
NOTE: Please be aware that for safety reasons, the batteries
are shipped at storage levels. This means that they are at nearly half
their capacity and should be charged before their first use.
Drone calibration
In order to obtain the best performance, the drone needs to be calibrated, which means to fine tune its inertial navigation sensors, namely the accelerometer, the magnetometer and the level horizon.
You should regularly perform this calibration process (at least once a month). Also, you should perform calibration each time you take the drone to a location far from the last calibration (>300km), or when the conditions are significantly altered (e.g.: very different altitude).
To calibrate the drone, you must have your computer connected to the drone (by connecting the drone and accessing the beXStream® platform) and go to the beXStream® application Menu Drones->Drone and press ‘Calibrate’. The application will contact the on-board flight controller and guide you through the process of calibration. Just follow the steps shown on screen. Take the drone to an open space to perform the calibration.
Warning
Please ensure that the drone is not armed before you start the calibration process, since this may cause you injury.**
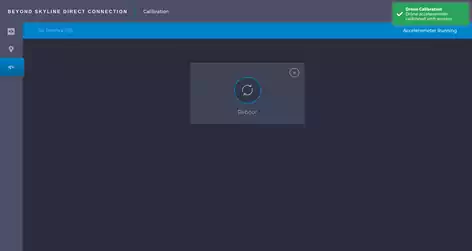
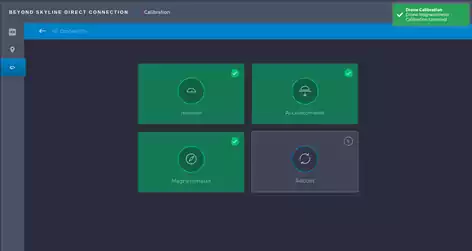
After pressing “calibrating drone” the following menu will be displayed:
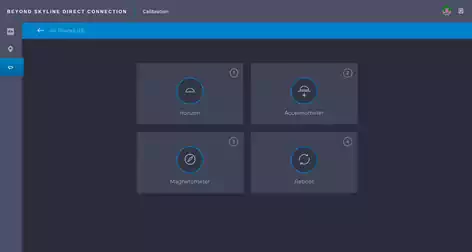
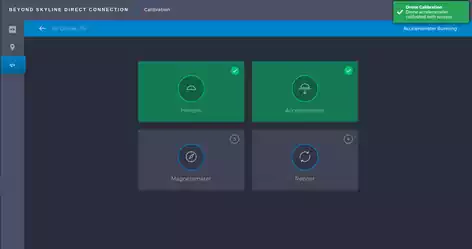
At this stage, there are three options for calibrating the drone sensors: horizon, accelerometer and magnetometer. There is also a reboot option for the end of each calibration.
To level the horizon of the drone, place the drone on an even surface and click “Horizon”. In Fig. 27 we can observe the result of a successful calibration. If the drone is not correctly placed the square will be reddish showing that it has failed.
To calibrate the accelerometer the drone will have to be held steadily in each position indicated in the depicted screen in Fig. 28. After the drone is in the desired position press next, to confirm and get indications for the next position: Six positions are needed: level, left side, right side, nose up, nose down, and upside down.
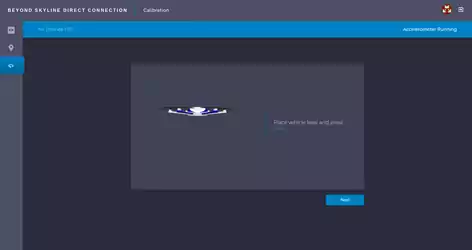
At the end, a reboot option will appear to save the calibration and restart the drone.
If the calibration fails, the square will be reddish and the user needs to restart the calibration.
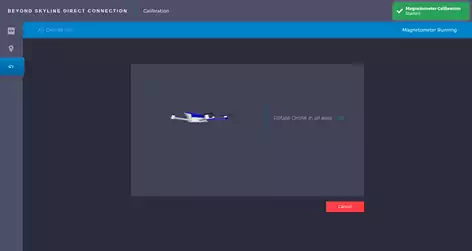
The calibration process of magnetometer requires the user to pick up the drone and rotate it at least twice in all his 3 axis.
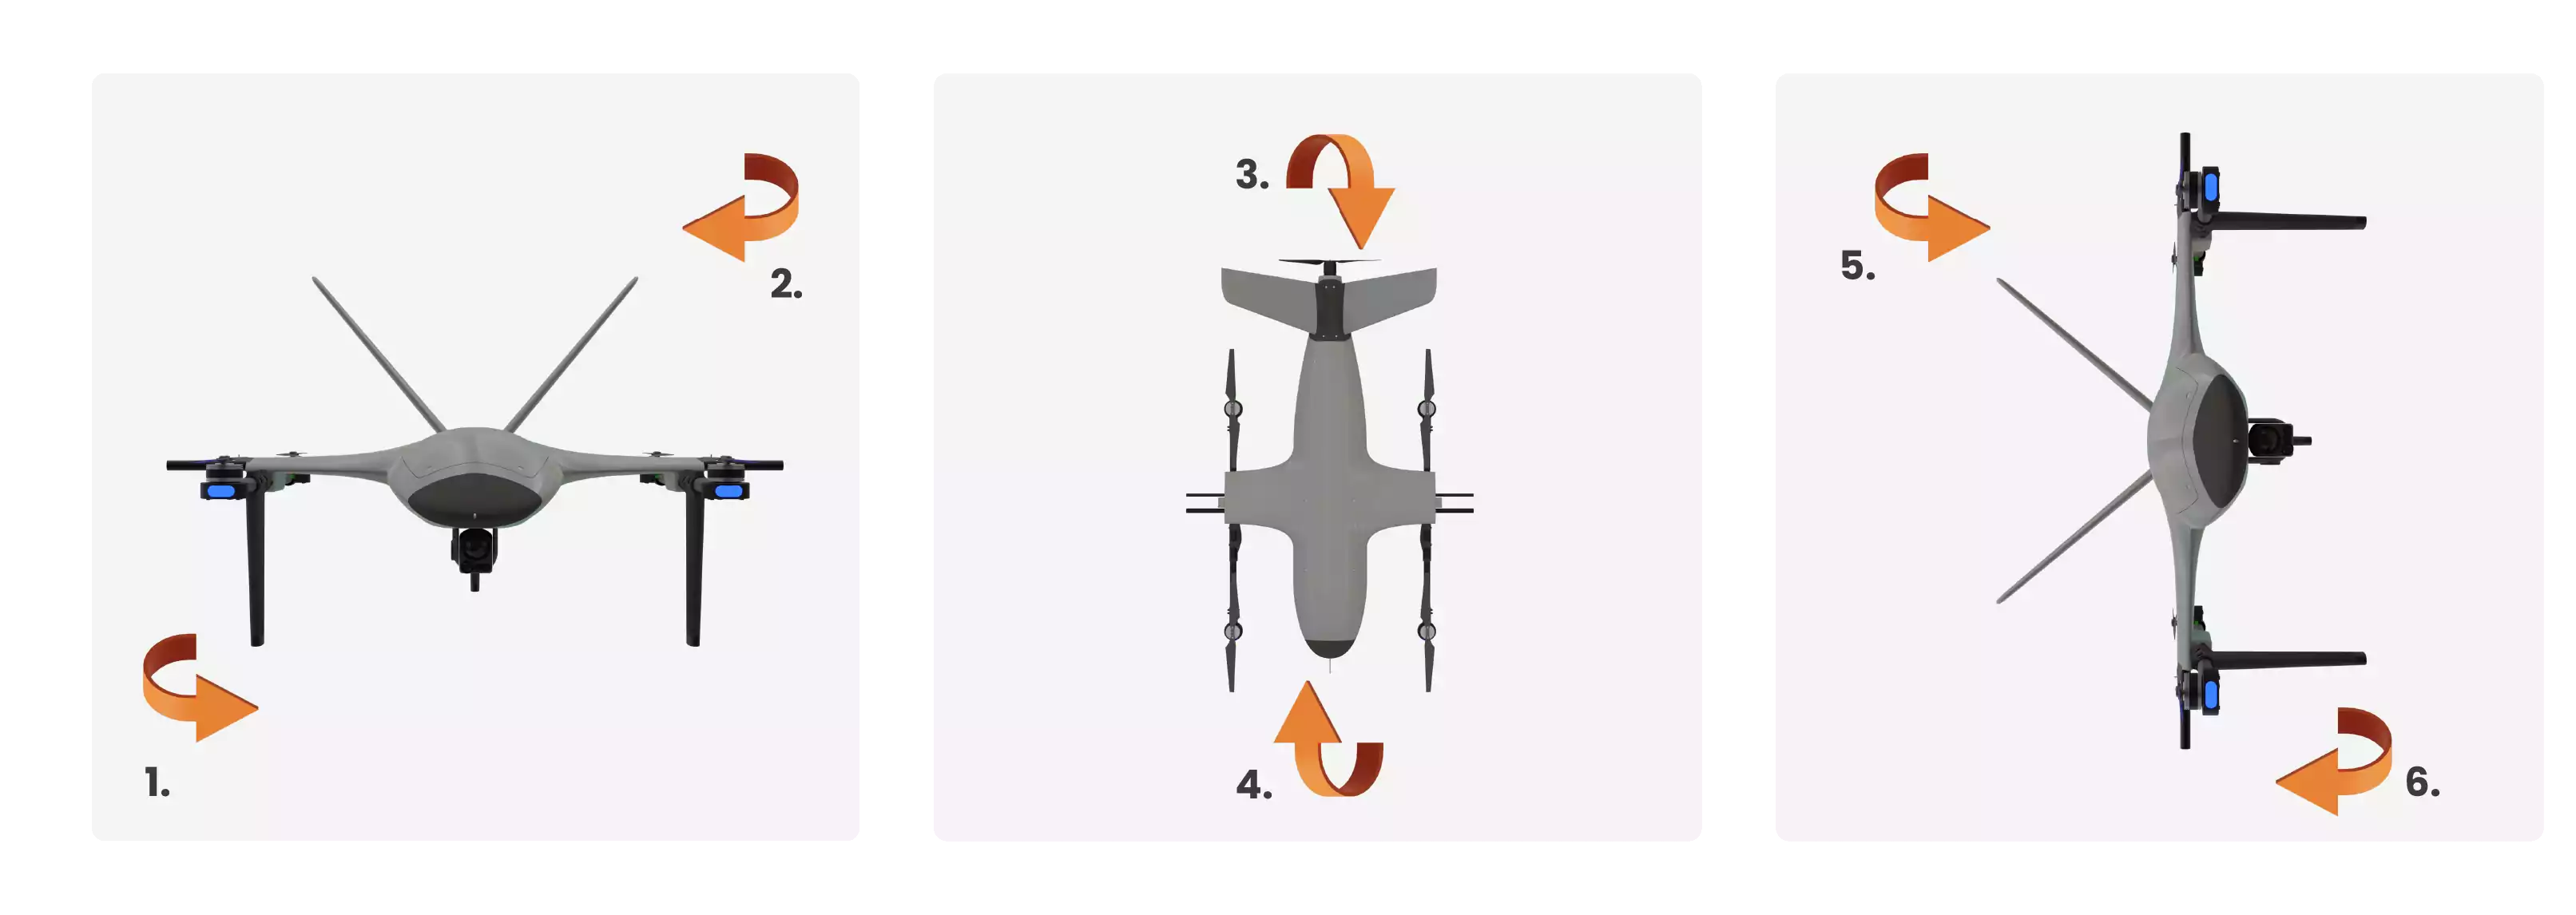
Rotation needed for the magnetometer calibration
Calibrating the magnetometer (compass)
In the figure, the drone is rotating and it’s possible to see all the rotations needed to successfully calibrate the drone.
Calibration Menu after successful calibration
Pitot Tube calibration
Calibrating the pitot tube on a fixed-wing aircraft is an essential procedure to ensure accurate airspeed measurements. The pitot tube is a small, forward-facing tube that measures the dynamic pressure of the air during flight.
Check Sensor Connection: Ensure that the airspeed sensor is properly connected to the autopilot system (flight controller) and is detected by the GCS. Verify that the sensor is functioning correctly and has a stable connection;
Perform Airspeed Calibration: For the airspeed calibration, make sure the drone is stationary and not experiencing any wind. The software will record the current pressure value as the zero point, as well as a default point.
Verify Calibration: After calibration, it is advisable to perform a test flight to validate the accuracy of the airspeed readings. Compare the airspeed indicated by the autopilot with the actual airspeed (if known) during the flight.
If successful, the application will show the success of the calibration on screen. If not, the application will ask you to start over, as this process is very important to assure the best performance of the drone.
Preparing to fly…
Before flight checklist
Although the VTONE is capable of flying with minimum requirements, it is advisable that you check a few things before each flight to ensure that the flight will be safer and more enjoyable.
The checklist presented below was prepared so that you can do a basic checking without the feeling that something was forgotten or left behind.
Checklist:
Missing or broken parts: Make sure that the drone has no missing or broken parts. Also, check if there are loose screws or nuts;
Cabling: Make sure the cables are firmly tightened and connectors are correctly plugged;
Batteries: Ensure that the batteries (both the drone and the operator control ones) are fully charged; Also check if the batteries are well locked on the drone
Arms and propellers: Confirm that the arms are firmly unfolded, and the propellers are also unfolded and properly tightened;
Rotors: Make sure that there is nothing obstructing the rotors free spinning. When ready to fly, make sure that the rotors start properly and normally. If any of the rotors signal an anomaly or present abnormal behavior, don’t fly, as this increases the chances of failure while flying;
Calibration: If needed, perform a calibration (see section 4.3);
Drone direction: The drone is pointed in the right take-off direction;
Pilot: When in manual mode, make sure that the person in charge of piloting the drone is over 16 years of age and has the knowledge needed to correctly control the drone. Also, make sure that he/she is not under the influence of alcohol or drugs as this might affect his/her ability to fly the drone.
And also,
Safe distance: As soon as the drone is activated and ready to fly, keep a safe distance for the drone as soon as it gets ready to fly (at least 3m);
Air space: If possible, chose an open-air, free of obstacles, space for flying. Don’t fly near airports, helipads, military facilities or other no-fly zones determined by local authorities;
Safety information: Have in mind the safety information presented in chapter 3.
Arming the drone
The VTONE flight controller has a special safety mechanism to avoid accidental activation of the drone. This mechanism relies on a safety switch (located on the back of the drone – please see section 2.2) that must be pushed in order to arm (activate) or disarm (deactivate) the drone.
The safety switch should only be pushed when the “before flight checklist” is fully checked and all the safety measures were considered.
Warning
Pushing the safety switch (and thus arming the drone) implies that the drone was deemed ready to fly and will only be waiting for the take-off command. So, as soon as this switch is pushed you should move away from the drone take-off area to avoid the possibility of serious injury.**
Although the drone may seem ready to fly, the flight controller may abort the drone’s activation if for some reason the conditions for a safe flight are not met. The conditions it demands to be fulfilled before flight are as follows:
Rotors: there are no reported failures on the rotors;
Calibration: the drone’s sensors were successfully calibrated;
Safety switch: the safety switch was pushed, signaling that the operator is ready to fly the drone;
Battery Level: the drone’s battery is above a set threshold.
At this stage, the drone is ready to be armed by using the Operator’s Control. Click the arm button on the bottom bar (please see section 2.3) and confirm that you want to arm the drone on the pop-up. Note that you should do this only if the drone is within your view range and in a suitable space to fly.
Warning
When in autonomous mode, please be aware that the drone can be remotely and asynchronously armed and take-off without local intervention. So, if your drone is planned to be able to carry out these missions, you should not come close to it without ensuring that it is safe for you to do so.
Rotors start/stop
When ready to fly and upon an arm (activation) command, the drone’s rotors will start spinning with a speed that matches the throttle joystick position and the flight mode on the Operator’s Control.
From here on, you can control the rotor’s spinning speed by using the throttle joystick as well as stop and restart the rotors.
NOTE: When commanding directly the rotors’ speed, one has to be aware that if the they reach a take-off speed, the drone will take-off.
Test flight
There are several circumstances under which you should make a test flight before starting using the drone for whatever mission you have. Please refer to the situations below, when Beyond Vision recommends that you perform a test flight:
On its first flight after unpacking and setup;
After repair from some serious anomaly;
After a SW update;
After a calibration procedure (as instructed in section 4.3).
After adding new accessories.
When in test flight, the drone should not be pushed too hard, as this flight’s purpose is to test if the drone can fly safe and smoothly. It is advisable that this flight be controlled by someone with experience and greater sensitivity to detect abnormal behavior at first glance. In case of abnormal behavior, please avoid using GPS-based modes.
If the drone doesn’t behave as expected, land it as soon as possible and try to correct the anomaly. If you are unable to correct it, please contact Beyond Vision’s technical support to help you.
Have a safe flight!
This chapter describes how to control the drone using the Operator’s Control and gearing the drone manually.
To learn how to instruct the drone to carry out autonomous missions, please see chapter 7 and the beXStream® platform.
Take-off and landing
When setting up for a manual flight, first go through the checklist described in section 5.1. Set the drone in a leveled surface and open all the propellers. After this, turn the power on, and for the first start of the day, wait at least 30 seconds for the GPS to get a good signal. Click the hardware safety switch, which enables arming the drone and get to a safe spot, with good visibility over it. It is a good idea to be aligned with the drone front (you are heading the same direction of the drone).
Make sure the you are in the desired flying mode (Cine, Position or Sport) and hold the throttle joystick down.
You can now arm the drone. This should get the propellers spinning, but not with enough thrust to lift the drone. Then, give it more throttle to make it go up. Ideally it should ascend to about 10 meters (relative to its takeoff spot), always make sure you maintain LoS of the drone and that you know which part is its front).
NOTE: In order to improve the controllability of the drone
and to ensure that it is distinguishable even in lower light conditions
from other flying vehicles, the VTONE comprises one light below each
rotor (being the front lights blue and all the others green).
To land the drone, bring it near the landing spot that you have chosen (should be a clear spot with no chance of collision) and activate the landing mode. The drone will come down faster until it reaches 10 meters (relative to takeoff altitude). After reaching this altitude it will slow down and descend until it lands. Throughout this process, the pilot always has control of yaw, pitch and roll, so small adjustments can be made to ensure a safe landing. After the drone touches the ground, you should disarm it. Also, you should press the hardware safety switch right afterwards.
There are two safety levels for the battery that are programed on the flight controller and they will be set off if the battery drops below the recommended flight levels. The first level of safety will trigger an RTL (Return To Land) event and the drone will return to where it took off and land. If the drone reaches a critical level of battery (the second safety level) it will trigger an automatic attempt of landing no matter where it is.
Warning
These safety levels were programmed as a failsafe in case of an unusual event, but you should always try to make sure that they are not reached, especially when designing an autonomous mission.**
Manually gearing the flight
During the flight, you can alternate between all the flight modes. During takeoff, you should always prefer Altitude Hold as referred in section 6.1. Before flying carefully study section 2.3 to understand the commands on the Operator Control. When alternating between flight modes, make sure you understand the differences in what comes to throttle. As an example, Stabilize flight mode will require far less throttle to keep the drone still in a position, despite the fact that it requires much more control from the pilot in terms of adjustments to throttle, roll, pitch and yaw. As such, when you change from Stabilize to Altitude Hold you should adjust the throttle immediately to avoid altitude loss.
NOTE: Note that Position Hold mode relies mainly on the GPS
position and as such you should be aware that its behavior will be
highly dependent on the quality of the GPS signal. When you disable
Position Hold, the drone will get back to the previous mode.
Switch between auto and manual operations
To take full advantage of the autonomous mode, you can make use of the autonomous missions’ feature (refer to section 7.3.1). To execute an autonomous mission that was already downloaded to the drone, you should first have the drone armed and a pilot with LoS. At this stage, you can activate the Autonomous Mode and the drone will takeoff and execute the mission.
Remember that the pilot always has the highest priority in terms of control, meaning that you can, at any time, change to a manual mode to regain control of the drone. In case you need to do so, you must be aware of the throttle position, which must be compliant with the status of the drone. For this reason, Beyond Vision recommends that before activating the Autonomous Mode, you should set it to Altitude Hold mode right after the arming of the drone, and have the throttle at center position. This ensures that, if you need to disable the Autonomous Mode, the throttle is already at a safe position to regain control.
Operator Control failsafe
While flying, there are situations that might affect the connection between the radio controller and the drone. These might even completely cut the communication between them. In this case, the drone has a radio failsafe mechanism that will trigger if:
The pilot turns off the Operator Control for more than 0.5 seconds;
The vehicle travels outside of Operator Control range and signal is lost for more than 0.5 seconds;
The pilot forces the throttle channel below the minimum from the transmitter;
If this happens, the radio failsafe is triggered, and the drone activates the RTL, eventually recovering the data link. This will not happen however if the drone is in Auto Mode mission, or if it is already landing.
Additional Notes:
If the VTONE is disarmed, no failsafe will take place.
If the VTONE is armed but has landed, it will immediately disarm;
If the VTONE is armed in Stabilize or Acro modes, and the throttle input is at the minimum, it will immediately disarm;
Otherwise, it will take the actions as configured in the parameters described below.
If the failsafe clears (i.e., transmitter and receiver regain contact) the drone will remain in its failsafe mode and it will not automatically return to the previous flight mode.
Emergency procedures
While flying, in the event of a rotor failure, normal landing is still likely possible, but you should make sure that you change to a manual flight mode, because the drone can become less stable (due to loss of balance between the rotors) and lose altitude (due to loss of the thrust by that rotor). In this case, you should compensate by adding throttle and use more yaw.
While flying, in the event of an imminent collision, you can make a disarm emergency on the drone. However, this should be last resort as the drone will crash and make some damages.
Device Care
Although designed to be, as much as possible, maintenance free, a few guidelines for best practices can help extend the life of your VTONE. This is especially true for the parts that are under greater pressure like the batteries, wings, rotors and propellers. The following sections intend to give an overview for best practices.
Batteries charging and handling
In order for the drone to work properly, its battery must be in good condition. This is critical because if the battery fails during the flight or the battery is not in good conditions, the drone will most certainly crash.
The VTONE uses heavy-duty 6S Li-Po batteries, with a capacity of 22000mAh and a nominal voltage of 22.2V. This battery topology demands a good cell balance between its six cells in order for the battery to maintain a good health status. So, it is recommended that this battery be charged with the VTONE charger and cables provided by Beyond Vision for this operation, because this charger ensures the maintenance of a good balance between cells during charging.
To charge the batteries, fit them into the charger, turn it on, and select balance charge at 15A. Then long press START and wait until the charging process ends (the charger will emit a sound warning).
As a rule of thumb, the VTONE battery is fully charged as it reaches 24.9V. The battery voltage is constantly being monitored by the charger voltage monitor.
It is advisable to always fly the VTONE with fully charged batteries. However, if this is not possible, you can still take-off, bearing in mind that the minimum voltage considered acceptable for it to fly is 20.4V. Note that the flight controller will try to land the drone if its voltage monitor indicates that the battery voltage falls below this threshold.
Warning
Never try to overcharge, over discharge, short-circuit or reverse the polarity of the battery as it might explode! The Li-Po is very sensitive when pushed to its limits and as such, one must exercise caution not to test its limits.**
Warning
If the battery exhibits any irregularity in its form (e.g. seems inflated), don’t use it! Dispose the battery following local regulations regarding battery recycling.**
Please refer to Appendix A.3 for further information on the safe handling of the VTONE batteries.
The Operator’s Control battery can be charged using a regular mobile phone charger. There are no special restrictions regarding this battery, but you should try to ensure that the device’s battery is always fully charged before flying if you are carrying out a manual operation mission.
Regular maintenance procedures
Calibration should be part of the regular maintenance procedures if you want your drone to always be at its best. So, you should calibrate the drone at least once a month. Also, you should perform calibration each time you take the drone to a location far from the last calibration (>300km) or if the new place has an altitude very different from the last one.
You should also perform calibration after any FW update or component replacement.
Please refer to section 4.3 and follow the instructions to calibrate your drone.
The VTONE drone doesn’t need any special type of cleaning to perform well. However, if it caught dust or any kind of dirt, you can clean it using only a humid piece of cloth (avoid placing it in contact with any electronic component) and/or an air pump. Do not use chemicals to clean the cover, the rotors or any other electrical part of the drone as they might chemically attack the cleaned parts and damage them.
Before cleaning you should remove the battery so that no electrical parts are active during the cleaning. Let the parts dry before you put the battery back on.
Some parts of the drone are under greater pressure than others, which means that they should be checked on a regular basis to ensure that a single part failure doesn’t compromise the device. The following parts are the ones that should be the target of special attention:
Propellers: the VTONE drone propellers are carbon-fiber based and so they are mechanically very strong. Nevertheless, they are subject to a lot of pressure during flight and as such, they require special attention, because they are critical to a stable flight condition. So, chipped, aged or broken propellers should be immediately replaced by new ones.
Troubleshooting
Putting the VTONE to work is a simple task. However sometimes, for some reason, it may not work as expected.
If this is the case, please take a look at the most frequent causes of failure and check if this helps you getting the VTONE up and running. If not, please contact Beyond Vision’s technical support using the contacts listed in chapter 1.
Troubleshooting table
Symptoms |
Probable Cause |
Resolution |
|---|---|---|
1. The drone won’t start. There are no lights on. |
There is no power |
1.1. Check if the battery is inserted; 1.2. Remove and re-insert the battery, ensuring that you hear the click of the clips locking the battery package; 1.3. Press the ON/OFF button for more than one second. 1.4. Check if you have a battery with enough charge (you can use the battery charger for this purpose). |
2. The drone powers up, but it refuses to arm. |
The drone doesn’t fulfill the arm criteria demanded by the flight controller. |
2.1. Check these criteria in section 5.2 and confirm that everything is in order; |
3. I can’t see my drone on beXStream® platform or the drone’s information is not updated in real-time in the platform |
Communications failure |
3.1 Check if you are within the range of the communications device installed on the drone; 3.2 If you are using mobile networks, check if the area where the drone stands is covered by the operator you are using; 3.3. Check if there was a communications failure by your operator (e.g. by using your cell phone). |
4. One or more rotors are presenting an abnormal behavior |
Mechanical or power supply problem |
4.1 Check if the rotors are rotating freely 4.2 Check if the power supply and signal connectors to the arms are well fit. |
5. I can’t access beXStream |
Connection Issues |
5.1 Check if you have internet access 5.2 Check if your internet provider/PC is not blocking the access to the website 5.3 Contact Beyond-Vision in case of 503 or 404 errors show up on your browser when trying to access the platform. |
Appendices
A.1 Technical specifications
The VTONE drone main specifications are listed below, grouped by function:
Technical specifications
Gr oup |
Description |
Value |
|---|---|---|
Class (EU Reg. 2019/945) |
3 |
|
PHY SICAL |
Dimensions (length x width x height) |
1600 x 2990 x 750 mm |
Net weight (w/battery; wo/battery) |
14.5kg ; 8.5kg |
|
Max. takeoff weight |
16.5kg |
|
Payload weight |
2kg |
|
Max. linear velocity |
20 km/h (quad); 120 km/h (wing) |
|
Max. angular velocity |
180º/s |
|
Max. wind speed tolerance |
50 km/h |
|
Max. autonomy |
150 min |
|
ELECT RICAL |
Battery type |
12S Lion |
Battery voltage (nominal) |
44.4V |
|
Battery max. current |
300 A |
|
Battery capacity (x2) |
16000 mAh |
|
Battery weight (x2) |
3 kg |
|
Voltage outputs |
48V, 12V, 5V, 3.3V |
|
Connection interfaces |
USB 2.0 / MIPI/ CSI / Ethernet / SPI / I2C / CAN |
|
Max. sound level |
100 dB |
|
RADIO |
Operator Control radio band |
2.4GHz |
Flight controller radio band |
2.4GHz |
|
RTK to base station radio band |
2.4GHz |
|
High-speed communications radio band |
Wi-Fi, 4G/5G |
|
Positioning constellations |
GPS L1/L2, GLONASS, QZSS, Beidou, GALILEO |
|
Positioning accuracy |
Down to 10cm |
|
ENV IRONM ENTAL |
Operating temperature |
0°C/+40°C |
Storage temperature |
0°C/+60°C |
|
Operating humidity |
< 95%, non-condensing |
A.2 Compliance information
The VTONE drone is CE marked which means that the product follows the European Directives ruling this type of devices.
Below you can find a list of the norms and directives applicable.
European directives and norm applicable to the VTONE
Area |
European Directive |
Harmonized norms |
|---|---|---|
Radio Equipment |
2014/53/EU |
EN301 893:2015 |
EN300 328:2015 |
||
EN300 440 |
||
EN303 413 |
||
EN300 220-1 |
||
Electromagnetic Compatibility (EMC) |
2014/30/EU |
EN301 489-1 |
EN301 489-3 |
||
EN301 489-17 |
||
Waste (WEEE) |
2012/19/EU |
|
Battery |
2006/66/EC |
|
RoHS |
2011/65/CE |
EN62321 |
Labeling |
ANSI/CTA-2063 |
A.3 Battery safety information
The VTONE comes equipped with two 12S Lion, 15000 mAh (each), 44.4V battery. This battery system is classified as Dangerous Goods Class 9 in the IMDG 4 CODE and IATA 5 DGR. So precautions should be taken when handling or transporting the battery. Namely, the battery should not be opened, punctured, immersed in liquids, destroyed or incinerated. Mechanical or electrical stress should also be avoided.
Store the batteries in a cool, dry and ventilated area, one subject to little temperature change. Do not expose the battery to direct sunlight nor to temperatures above +70ºC (+158º F).
For further information, please refer to the Battery Safety Sheet information, released according to the EU Directive 93/112/EC, provided by the manufacturer of the battery and publicly available on Beyond Vision’s website. Carry the safety information sheet along with the batteries if you have to transport them by sea or plane.
- 1
Cine mode is a pilot mode where the speeds are limited to: 3m/s (horizontal), 1.5m/s (upward), 1m/s (downward) and 12º/s (yaw).
- 2
Position mode is a pilot mode where the speeds are limited to: 10m/s (horizontal), 3m/s (upward), 2.5m/s (downward) and 20º/s (yaw)
- 3
Beyond Vision takes no responsibility for damage caused by batteries if they are not original parts.
- 4
IMDG: International Maritime Dangerous Goods
- 5
IATA: International Air Transport Association